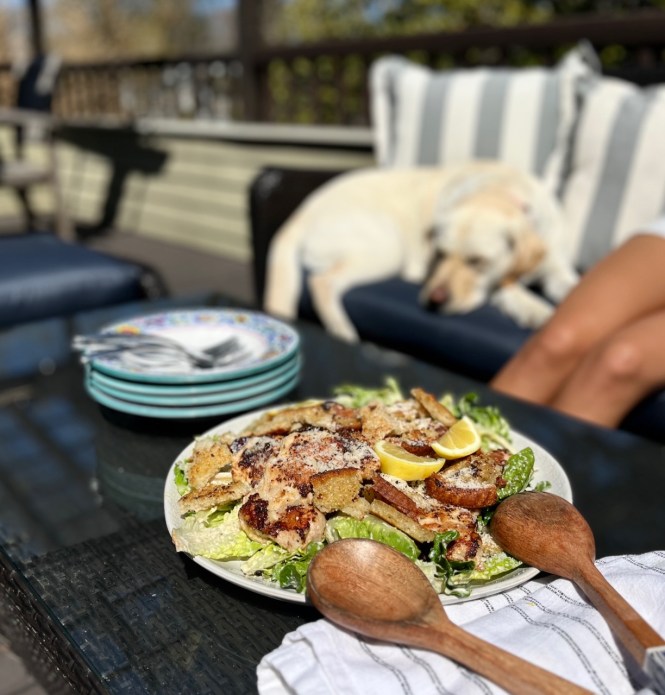
Spaghetti alla Nerano

The best zucchini spaghetti from La Scoglio, Italy, probably my favorite restaurant I’ve ever been to.  It’s one of those dishes that is so iconic in the Amalfi Coast, yet it’s easy to replicate at home.  Using the best quality ingredients is of the utmost importance, as they always do in Italy. 

La Scoglio is one of those places you never forget.  Built into the rocky cliffs in the seaside town of Marina del Cantone, it’s literally sitting over the bright blue sea.  The De Simone family is running it for the third generation now – their farm to table cuisine can’t be beat, and this is one of their incredible signature dishes.  

Stanley Tucci shared the actual recipe from the restaurant, which is incredibly simple but requires a lengthy overnight in the refrigerator.  I have simplified it here by also removing the deep frying process for the zucchini – it may not be authentic, but it’s much faster and easier this way and I think it tastes great. The trick is a quick shallow fry – I like a deep pan for this, but you can even use a frying pan – just make sure you have at least 1/2 ” of oil to get them cooked properly.  

After cooking the zucchini rounds in batches, you need to season them with salt, cracked black pepper, and I like to use red pepper flakes as well.  

Spaghetti alla Nerano

Print Recipe
Fresh Zucchini Spaghetti
Course dinner, Lunch, Main Course
Cuisine Italian
Keyword pasta, zucchini spaghetti, zucchini
Prep Time 10 minutes
Cook Time 25 minutes
Total Time 35 minutes
Servings 4

Ingredients

  • 5 small to medium zucchini squash
  • 1 clove garlic, lightly smashed but in tact
  • 1/2 - 3/4 cup olive oil
  • kosher salt, black pepper
  • 1/2 tsp red pepper flakes (optional)
  • 3/4 lb spaghetti
  • 3/4 cup freshly grated parmesan
  • 3 Tbsp butter
  • 1/2 cup chopped or torn fresh basil

Instructions

  • Using a mandolin, or a sharp knife, slice the zucchini into 1/8" thick discs - you should have a very large pile.
  • Set a large pot of water over high heat to cook the spaghetti - season liberally with salt.
  • Heat the olive oil over medium heat in a small dutch oven or a shallow frying pan, so that you have about 1/2" depth of oil - you want to shallow fry the zucchini discs in the oil. When the oil is hot, add the garlic clove until is sizzles and turns caramel in color, then remove and set aside. In small batches, cook the zucchini in the hot oil until just barely browning. Remove to a paper towel lined baking sheet and sprinkle with salt and black pepper. You can also add red pepper flakes at this point - I like them here!
  • Continue cooking the zucchini in small batches until all of it has been cooked down. When you are finishing this process, start to cook the spaghetti according to package directions for al dente - usually about 10-11 minutes.
  • When the spaghetti is almost ready, take 1/2 cup of the cooking water, and add to a blender or food processor along with about 1/3 of the cooked zucchini. You can also do this with a potato masher in a bowl - you are looking to make a paste to thicken the pasta sauce. Blend until smooth, then place in a large shallow bowl you will use for the pasta.
  • Add the cooked spaghetti, the butter, the parmesan, and most of the basil, along with the rest of the cooked zucchini rounds. Toss until everything has blended into a smooth consistency - you can adjust for more or less broken up zucchini, depending on your preferences. Top with extra black pepper, parmesan and fresh basil. Buon Appetito!

Notes

This recipe is a slightly varied take on the original recipe from La Scoglio - they deep fry their zucchini and let it rest overnight in the refrigerator - this one is a little simpler, and I think tastes just as good!
Continue Reading

Greek Pasta Salad with Basil and Feta

A Greek Pasta Salad filled with fresh vegetables, vinaigrette with feta and basil.

This recipe came about by accident one night when I was making grilled chicken and a greek salad on the side, and more people showed up so I added the pasta to the salad to fill up the table.  It was a delicious and easy summer upgrade and has become a favorite in rotation. 

You may have noticed I’m a little behind on posting this summer. Like most of you, I am trying to savor summer and be outside as much as possible.  This is one of those meals you can make ahead, and have on hand for days at the ready – leaving more time for swimming, and being with family and friends.  It’s also the perfect thing to bring to the beach or on the boat!

Greek Pasta Salad with Basil and Feta

Print Recipe
Greek Pasta Salad filled with fresh vegetables, vinaigrette and crumbled feta
Course dinner, Lunch, Salad, Salad, Lunch, Dinner, snack
Cuisine Mediterranean
Keyword pasta salad, greek salad
Prep Time 15 minutes
Cook Time 10 minutes
Total Time 25 minutes
Servings 8

Ingredients

  • 1 lb bite sized pasta - I like large shells
  • 2 pints halved cherry tomatoes
  • 1 small red onion, cut into bite sized slivers
  • 1/2 English cucumber, chopped into bite sized pieces
  • 2 cups mini peppers, chopped into small pieces
  • 1/2 cup chopped fresh basil
  • 1/2 cup olive oil
  • 1/3 cup red wine vinegar
  • 1 Tbsp dried oregano
  • 1/2 tsp red pepper flakes
  • 3/4 tsp kosher salt
  • 1/2 tsp black pepper
  • 1 lb. block feta cheese, broken into bite sized pieces
  • optional - add chopped peperoncini to garnish

Instructions

  • Heat a large pot of water to boil for cooking the pasta. Heavily salt and cook according to package directions.
  • Meanwhile, In a large bowl or platter with edges, pile in the veggies; tomatoes, onion, cucumber, peppers, and basil, tossing to combine.
  • In a jar or small glass bowl, combine the olive oil, vinegar, oregano, chili flakes, salt and pepper, shaking or stirring to combine.
  • When the pasta is done, drain and add to the bowl with the veggies. Toss the vinaigrette on top and fold everything together while the pasta is warm - this will help it absorb the flavors. When it's cooled to room temperature, add the feta, and top with chopped peperoncini if desired.

Notes

This is a flexible recipe, like most pasta salads, so you can swap out veggies as you find your favorites.  The vinaigrette is delicious and I often double it to have on hand.  I also like to add more if using the next day, so if you make this ahead, I suggest making extra dressing.
Continue Reading

Seared Tuna Salad with Avocado and Scallions

The perfect summer salad from the Barefoot Contessa with a lime soy vinaigrette, scallions and avocados, topped with sesame seeds.

This is a salad I’ve been making for over. decade, and it fell off my radar for a while, so I’m happy to bring it back just in time for the July 4th weekend.  It’s a great addition to any potluck, or just a simple summer lunch or dinner.  Light and healthy, but absolutely full of flavor and takes almost no time at all to compose.  

The best part about this is you can assemble it early in the day and the flavors will meld over time.  Don’t make more than 8 hours in advance tho, as the acid in the dressing will start to macerate the tuna.  

Seared Tuna Salad with Avocado and Scallions

Print Recipe
Classic Barefoot Contessa Salad with Tuna, Avocado and Scallions
Course dinner, Lunch, Salad
Cuisine American, Mediterranean
Prep Time 15 minutes
Cook Time 5 minutes
Total Time 20 minutes
Servings 6

Ingredients

  • 2 lbs Sushi Grade Tuna Steak, about 1 inch thick
  • olive oil (1/4 cup, plus more for cooking the fish)
  • kosher salt and black pepper
  • 1 tsp wasabi powder or paste
  • zest from 2-3 limes
  • 6 Tbsp freshly squeezed lime juice (3-4 limes)
  • 2 tsp soy sauce
  • 10 dashes Tabasco Sauce
  • 2 ripe avocados, diced
  • 1/2 cup thinly sliced red onion
  • 1/4 cup chopped scallions
  • 2 Tbsp sesame seeds

Instructions

  • Heat a cast iron skillet over medium high heat. Coat the tuna steak(s) with a couple of tablespoons of olive oil, and coat liberally with kosher salt and black pepper. When the skillet is very hot, sear the tuna steaks 2 minutes per side, making sure to only cook the very outside of the fish - you want the inside to be rare and cool in temp. Set aside.
  • For the dressing, in a small bowl, whisk together 1/4 cup olive oil with the lime juice and zest, wasabi powder or paste, soy sauce, Tabasco, and 2 tsp kosher salt, and 1 tsp black pepper.
  • In a larger bowl, toss the avocado with the dressing, the red onion, and then fold the tuna and scallions in. To serve, lay the salad onto a platter, and top with sesame seeds.

Notes

This salad comes from Barefoot Contessa's At Home Cookbook, and is called Grilled Tuna Salad.  I find it easier, given the quick cook time to simply sear it in the pan on the stove top, but it works great on the grill as well.  It's an amazingly simple and easy dish, that always impresses a crowd.  
Continue Reading

The Summer Fridge Salad

A version of the acclaimed “Jennifer Anniston” salad – healthy and delicious!

This salad is exactly what you want around for the next few months.  It’s a full meal in itself, tho goes great with anything on the grill, and sits happily for days in the refrigerator, never losing integrity.  It’s uber healthy, and full of things you likely will have on hand anyway.  I scaled this for our family of 6 plus leftovers, so you may want to cut it in half if you don’t have that many eaters.

The fresh herbs pictured are interchangeable, based on what you prefer – I use basil, mint and parsley, but cilantro would be great here too.  I also like to add chopped cherry tomatoes, but they won’t sit as well in the salad over a period of time, so just throw them in when you make a plate.  

The Summer Fridge Salad

Print Recipe
Hearty Quinoa, Cucumbers, fresh herbs, feta and pistachios
Course Salad, Lunch, Dinner, snack
Cuisine American
Keyword quinoa salad, summer salad, make ahead salad
Prep Time 10 minutes
Cook Time 20 minutes
30 minutes
Servings 8 people

Ingredients

  • 2 cups cooked quinoa I use white, but you can use any kind
  • 2 cups chopped English cucumber
  • 3/4 cup chopped red onion
  • 1-2 cans chickpeas (to your liking)
  • 1 cup chopped mixed parsley, basil and mint
  • 2 lemons, juiced
  • 1/3 cup olive oil
  • kosher salt and black pepper
  • 8 oz broken fresh feta (from a block)
  • 1/2 cup roasted and salted pistachios

Instructions

  • In a large bowl, combine the cooked and cooled quinoa, cucumber, red onion, chickpeas, and fresh herbs, tossing to mix. In a small jar, shake up the lemon juice and olive oil with 3/4 tsp kosher salt and 1/2 tsp black pepper, then pour over the salad, again tossing to combine.
  • Add the crumbled feta and pistachios to the salad, then check for seasoning.
  • As the salad sits in the fridge, you may need to add a splash of extra lemon juice and olive oil, salt and pepper. This will keep for days and be delicious and ready to eat whenever you need a snack!

Notes

There are countless versions of this famed salad, and this mixture hits all the notes I love.  I tend to like fewer chickpeas, but you can use up to two cans here to beef up the protein content.  
Continue Reading

Summer Melon Salad with Feta and Mint

Watermelon, Cucumber, Feta, and mint tossed in a lime vinaigrette.

Countless versions of this salad are out there, and most of the recipes keep it streamlined and simple to allow the fresh ingredients to come through.  I like the balance of the cucumber to reduce the sweetness of the melon, and the lime vinaigrette is the perfect finish with fresh herbs.  Though I wouldn’t recommend making it ahead, I’ve been known to eat this a day later – sometimes it can break down a bit, so toss with the dressing just before eating if possible.  

Here’s a quick video link for how to make this salad!  https://www.tiktok.com/@walestable/video/7099119318050311467?_t=8SV0qFb5PdG&_r=1

Summer Melon Salad with Feta and Mint

Print Recipe
The perfect summer salad of melon, cucumber, feta and a minty lime dressing.
Course Salad, Lunch, Dinner, snack
Cuisine American
Keyword Summer Salad, Watermelon Salad, Melon Salad
Prep Time 10 minutes
Total Time 10 minutes
Servings 4 people

Ingredients

  • 3 cups sliced or chopped watermelon (about 1/4 of a standard watermelon)
  • 2 cups cantaloupe or honeydew, chopped
  • 1 cup sliced Persian or English cucumbers
  • 1/4 cup olive oil
  • 2 Tbsp freshly squeezed lime juice
  • 1 Tbsp honey
  • 2 Tbsp fresh chopped mint leaves
  • kosher salt and pepper
  • 4 oz sliced feta (I prefer using a block of feta to the crumbles)
  • 1/4 cup toasted pistachios
  • 2 Tbsp fresh chopped chives
  • 2 Tbsp fresh chopped basil

Instructions

  • To make the salad, arrange the melons and cucumber on a platter - this is a good salad for a large platter so that the dressing and herbs get scattered easily, without having to toss it.
  • Make the dressing - combine the lime juice, olive oil, honey, salt, pepper, and chopped mint in a small jar, shake to combine.
  • When ready to serve, pour the dressing over the salad, top with feta, pistachios, chives and basil to finish.

Notes

This is a great recipe for a summer barbecue or picnic - it's great kept cold, so keep in a cooler.  
Continue Reading

Crispy Sour Cream and Onion Potatoes

Crispy Oven Baked Baby Yukon Golds bathed in seasoned olive oil and topped with a yogurt Chive dip.

This is the kind of thing that disappears as soon as you take it out of the oven.  Hungry people sense it and devour it immediately.  It’s insanely delicious, incredibly easy to make, and while it makes a great side dish for dinner, it’s also just a great snack or appetizer.  Full credit here goes to Tieghan Girard’s new cookbook  “Half Baked Harvest, Every Day”   No link here, but I can provide you with a video of how I made them!

 https://www.tiktok.com/@walestable/video/7098471443549146411?_t=8SOUTmX9fdG&_r=1  


I’ve made crispy baked potatoes like this before, but the sour cream and onion seasoning here takes the idea to a whole new level – you can replicate this with any type of seasoning you like – taco’s and serve with a side of guacamole, a little cayenne with a side of blue cheese – but trust me this recipe is the place to start.  Flavor is layered in every step of the process, starting with salting the water for the potatoes in cooking round 1.  

Crispy Sour Cream and Onion Potatoes

Print Recipe
Crispy Oven Baked Potatoes tossed with Seasoning and a Side of Yogurt Chive Spread
Course brunch, dinner, Side Dish
Cuisine American
Prep Time 25 minutes
Cook Time 30 minutes
Servings 6 people

Ingredients

  • 2 lbs baby Yukon gold potatoes
  • 1/2 cup olive oil, plus more for greasing the pan
  • 1 Tbsp kosher salt
  • 2 cups sour cream or greek yogurt I like 1 cup of each
  • 2 Tbsp chopped fresh chives
  • 2 tsp onion powder
  • 1 tsp garlic powder
  • 1 tsp dried parsley
  • 1/2 tsp dried dill
  • 2 Tbsp grated pecorino or parmesan
  • fresh herbs for serving
  • flaked salt and pepper

Instructions

  • Preheat the oven to 450, placing racks in the upper and lower thirds. Grease two baking sheets with olive oil.
  • Place the potatoes in a large pot and cover with enough cold water to cover by 1 inch. Season the water with the kosher salt, bring to a boil, and then simmer for about 15 minutes, until the potatoes are fork tender. Drain, and allow to cool slightly.
  • Toss the potatoes on the baking sheets, divided evenly. Using a glass with a flat bottom, gently smash the potatoes, causing them to flatten to about 3/4 inch thick. Bake for about 25 minutes until the potatoes are crispy on the edges.
  • Meanwhile, in a small bowl, mix the 1/2 cup of olive oil with the onion powder, garlic powder, parsley, dill, parmesan, and a pinch each of kosher salt and pepper. When the potatoes are done, toss them with this seasoning oil, using a spatula to move them around, allowing them to break up into bite size pieces.
  • Mix the Greek Yogurt or Sour cream with the chopped chives, about 1/2 tsp salt and pepper, and stir to combine. Line about half of the mixture on the bottom of your serving platter, making a bed of dip for your little potato nuggets. Drop the potatoes on top, sprinkle with more fresh herbs, and serve with extra dip on the side.

Notes

This recipe comes from Tieghan Girard's new Cookbook, Half Baked Harvest Every Day, which is filled with genius ideas!  No link for the recipe, but you can buy the book on Amazon!
Continue Reading

Crispy Folded Buffalo Chicken Quesadilla’s

Buffalo Chicken Quesadilla’s folded with a cilantro ranch and pepperjack cheese.

Over the last couple of years there have been countless variations on this folded quesadilla method – this one is based on a Half Baked Harvest recipe, and it’s absolutely delicious.  The recipe is adaptable for your own tastes – you could do a Mexican spin or a blackened seasoning, swap out the ranch for another sauce – whatever you like.  The method is fun, and I like it best with the cheese on both of the outer layers, so place the ingredients in the correct order as shown for the best melting ability.  

Crispy Folded Buffalo Chicken Quesadilla

Print Recipe
Crispy Fried Buffalo Chicken Quesadilla with Cilantro Ranch and Pepperjack
Course dinner, Lunch
Cuisine American
Keyword folded wrap, buffalo chicken, quesadilla

Ingredients

  • 3 split chicken breasts, bone-in and skin on
  • olive oil, salt and pepper
  • 3/4 cup Franks Red Hot Sauce
  • 2 Tbsp sour cream
  • 6 slices pepperjack cheese (use cheddar if you prefer)
  • 8 oz shredded cheddar and jack cheese
  • 1/2 cup chopped fresh cilantro
  • 1 bunch scallions, chopped
  • 2 Tbsp chopped chives
  • 2 cups chopped romaine or butter lettuce
  • 6 burrito size tortillas (large)

Cilantro Yogurt Ranch

  • 1 cup greek yogurt
  • 1 cup sour cream
  • 1/2 cup chopped cilantro
  • 2 Tbsp chopped chives
  • 2 tsp onion powder
  • 2 tsp garlic powder
  • kosher salt and black pepper to taste

Instructions

  • Preheat the oven to 350 degrees. Rinse and pat dry the chicken breasts, place on a baking sheet, drizzle with olive oil and sprinkle liberally with salt and pepper. Roast for 35 minutes, until internal temp reaches 165 degrees. Set aside to cool.
  • When the chicken has cooled, remove the skin and bones, and shred the meat into small pieces by hand. Combine the torn chicken with the Frank's Red Hot and 2 Tbsp of sour cream, along with a pinch each of salt and pepper. Set aside for assembly.
  • Make the Ranch - combine all ingredients and stir together into a smooth consistency. This will make WAY more than you need, but it's great to serve along side and use for veggies afterwards.
  • To assemble the Quesadilla's, lay the tortilla out on a cutting board, and cut one slit into the center of the disc. You are working with four quadrants, and you want both of the outside pieces to have cheese for melting, so place ingredients as pictured, in the following order. Lower left, chicken and sprinkle with chopped chives; upper left, a smear of ranch, topped with chopped lettuce, scallions and cilantro. Upper right, a slice of Pepperjack cheese; lower right a combination of grated cheese.
  • Fold the wrap up into one triangle with four layers - starting with the lower left, fold the chicken up over the romaine and ranch, then fold over to the top right, and finally lower right. You will have a wedge of stacked quesadilla to pan fry and melt the cheese.
  • In a cast iron or non-stick skillet over medium heat, coat the pan with olive oil, and sear the outsides of the wrap on both sides, taking care to keep all ingredients tucked inside safely. Serve alongside with extra ranch and a drizzle of Frank's, with chopped chives and cilantro to top.

Notes

This recipe is SUPER flexible - you can make the chicken with any type of seasoning (Mexican, blackened), mix in any cheese or spreads you prefer - it's a great method for a fun take on a quesadilla.  
This recipe is based on Half Baked Harvest's Folded Crispy Buffalo Chicken Wrap, though I changed a few small parts.  https://www.halfbakedharvest.com/buffalo-chicken-wraps/
Continue Reading

Roast Chicken, Poblano and Goat Cheese Enchiladas

The ultimate enchiladas with Roasted Chicken, smoky poblano peppers, goat and pepper jack cheese, served with smashed avocado and fresh cilantro.

Enchiladas are in regular rotation here, mostly because it’s an incredibly easy meal to make in advance.  It’s like a big Mexican lasagna and you can cater to personal likes and dislikes on every ingredient.  This recipe works great without the chicken too for a vegetarian spin – just increase the amount of beans, corn and peppers.  

I based this recipe on the Barefoot Contessa’s Cheesy Chicken Enchiladas (Modern Comfort Food), but I skip the sauce making and go for the jar.  I have tried it both ways, and the effort on the sauce, while valiant, isn’t necessary in my opinion.  I love Whole Foods 365 Red Enchilada Sauce, and the goat cheese in the filling (and on top!) sets these apart from the pack. 

Roast Chicken, Poblano and Goat Cheese Enchiladas

Print Recipe
Ultimate Enchiladas stuffed with roast chicken, poblanos, goat and pepperjack cheese
Course dinner
Cuisine Mexican
Keyword enchiladas
Prep Time 30 minutes
Cook Time 30 minutes
Servings 6

Ingredients

  • 3 split chicken breasts, bone in and skin on
  • olive oil, kosher salt and pepper
  • 2 15 oz jars of red enchilada sauce I like Whole Foods 365 brand
  • 1 yellow onion, chopped
  • 1/2 poblano peppers, chopped
  • 2 cloves garlic, minced
  • 1 cup fresh or frozen corn kernals optional
  • 1/4 cup chopped scallions, plus more for serving
  • 1 tsp chili powder
  • 8 8 in. flour tortillas
  • 8 oz plain goat cheese
  • 12 oz grated cheese (cheddar, jack, pepperjack)
  • fresh cilantro, limes, avocados and sour cream for topping

Instructions

  • To roast the chicken, preheat the oven to 350 degrees. Rub each chicken breast with olive oil, salt and pepper. Roast on a baking sheet for about 35 minutes, until it reaches 165 degrees. Set aside to cool, then shred into small pieces. Keep the oven at 350 degrees for baking the enchiladas when assembled.
  • In a large saute pan over medium heat, add 2 Tbsp olive oil, then saute the chopped onion and poblano peppers for about 5 minutes. Add the garlic, corn kernels, black beans, scallions chili powder, and a pinch each of salt and pepper, stirring for a couple more minutes. When everything is soft and combined, set aside to cool.
  • Grate the hard cheese, and add the pulled chicken to the sautéed vegetables. Add about 1/2 cup of enchilada sauce to the mixture, along with about 1/3 of the grated cheese. This will be the base of the filling.
  • To assemble the enchiladas, pour about 1/2-3/4 cup of the enchilada sauce into the bottom of a 9x13 baking dish. Using the dish to coat the tortillas, baste them in the sauce, and one at a time, put a scoop of the mixture, along with a few pieces of crumbled goat cheese, into each tortilla and roll up. Place the filled toritalls seam side down and nestle together into the baking dish. You will have 8 when finished, making sure to reserve some goat cheese for the topping. Top the dish with the remaining enchilada sauce, the rest of the grated cheddar or pepperjack cheese, and a few crumbles of goat cheese.
  • Bake in the center rack for about 30 minutes, until the entire dish is bubbling and the cheese is gold brown. Let the enchilada's sit for at least 10 minutes before serving (they will fall apart if you dig in too quickly).
  • To serve, using a long thin spatula, remove one enchilada to each plate and top with smashed avocado, cilantro, a scoop of sour cream, and lime wedges.

Notes

This dish is excellent for making ahead - simply assemble fully, cover with plastic wrap, and bake for 30 minutes when ready to eat.  They will keep for days and make amazing leftovers too!
Continue Reading

Cacio e Pepe

Classic Italian Pasta with Pecorino and Pepper

There might not be a simpler dish than this.  It’s easy, fast, and one of the most delicious dinners I know of.  It’s a little indulgent, but the ease of it makes it great for Monday or Saturday all at once.  It’s a great meal for company, given it takes only minutes to pull together.  It’s also perfect for Tuesday when you are starving and haven’t gone to the store, as the ingredients are typically on hand.  

A huge tip for the best flavor is making sure to bloom the pepper in the melted butter before tossing everything together.  And you MUST use freshly cracked pepper – it makes all the difference.  Same goes for the cheese – the best way to do this is buy a block of pecorino (or parmesan) and grate it in the food processor.  It take seconds and makes the best texture in this dish.  

Cacio e Pepe

Print Recipe
Classic Italian Pasta with Pecorino and Pepper
Course dinner
Cuisine Italian
Cook Time 15 minutes
Total Time 15 minutes
Servings 4
Cost $8

Ingredients

  • 1 lb. dried pasta - I prefer spaghetti or linguini
  • 4 - 5 Tbsp butter
  • 2 tsp freshly crushed black pepper
  • 1 cup grated pecorino or parmesan cheese plus more for topping

Instructions

  • Bring a large pot of heavily salted water to boil. Cook the spaghetti (or whatever pasta you plan to use) according to package directions, less one minute. Reserve 1 cup of pasta water before draining.
  • Meanwhile, when the pasta is close to done, heat a large saute pan over medium heat. Melt 3 Tbsp of the butter in the pan and toast the crushed pepper in the fat. Cook only for one minute, then add the cooked (drained) pasta directly to the pan and toss to coat with the butter and pepper. Toss in the full cup of grated cheese, continuing to stir and use the reserved pasta water to reach a desired silkiness with the sauce - I tend to use 1/2 to 3/4 cup.
  • Top with extra fresh pepper and grated pecorino - enjoy!

Notes

This recipe exemplifies the beauty of Italian cooking with minimal high quality ingredients, lending an extraordinary result with only minutes to cook.  I like pepper - feel free to use less for your own tastes.  Also, the cheese is up to you - I prefer pecorino over parmesan, as it's the classic for this recipe, but they both work!
Continue Reading

Grilled Chicken Bowls with Avocado Cucumber Salsa and Spicy Sriracha Sauce

Simply Grilled Chicken Tenders in a bowl with a fresh avocado cucumber salsa and a spicy sriracha sauce

Weeknights often demand a meal that can sit and wait happily, be served in several rounds to a crowd with differing tastes, and still maintain integrity.  “Bowls” fit the bill in all categories, allowing everyone to customize to their own likes, making this a very easy family dinner.  This post is a method as much as it is a recipe – you can customize this with whatever protein you prefer.  

To me, the star of this post is the grilled chicken.  The marinade is flexible, but flavorful, and allows overnight resting due to a low acid content.  The chicken, once cooked, can be kept for several days for future salads, bowls, or sandwiches.  My favorite ingredient in the marinade is by far the Worcestershire – not always something people use with chicken, but it works great here.

The best part about this whole recipe is that everything can be made in advance.  You could even assemble it a day or two ahead, allowing for a great busy weeknight meal or a crowd pleasing dinner party treat.  This could also be a great dinner for Cinco De Mayo.  

Grilled Chicken Bowls with Avocado Cucumber Salsa and Spicy Sriracha Sauce

Print Recipe
Marinated Chicken Tenders served with a fresh Avocado Cucumber Salsa and Spicy Sriracha Sauce
Course dinner, Lunch
Cuisine American
Keyword grilled chicken, burrito bowl, avocado cucumber salsa
Prep Time 15 minutes
Cook Time 30 minutes
Total Time 45 minutes
Servings 6

Ingredients

Grilled Chicken Tenders

  • 3 lbs chicken tenders, or sliced chicken breast meat
  • 1/2 cup olive oil
  • 4 cloves garlic, finely chopped
  • 3 Tbsp Worcestershire sauce
  • 1 lemon, grated zest and juiced
  • 1 tsp red pepper flakes
  • 1 tsp dried oregano
  • 1 tsp paprika
  • 1 tsp kosher salt, plus more for sprinkling later
  • 1 tsp black pepper, plus more for sprinkling later

Avocado Cucumber Salsa

  • 2 avocados, chopped
  • 1/2 English cucumber, chopped into small bites
  • 2 Tbsp chopped fresh cilantro
  • juice of one lemon or lime
  • 1 Tbsp olive oil
  • kosher salt and black pepper
  • tabasco sauce (4-10 dashes, to taste)

Spicy Sriracha Sauce

  • 1/2 cup mayo
  • 2 Tbsp Sriracha
  • 2 Tbsp buttermilk to thin (optional)
  • kosher salt and black pepper to taste

Bowls and Assembly

  • 3 cups cooked basmati or jasmine rice
  • halved cherry tomatoes, sprinkled with salt
  • chopped fresh cilantro or basil
  • lime or lemon wedges

Instructions

Grilled Chicken Tenders

  • To marinate the chicken, combine all ingredients (olive oil through salt and pepper) and pour over the chicken tenders, letting them sit for at least 15 minutes, and up to overnight.
  • Heat a grill, grill pan, or cast iron skillet over medium/high heat. When ready to cook the chicken, remove it from the marinade, sprinkle with extra salt, and cook each piece until done. Remove and set aside, repeating until all of the chicken is cooked. This can be done up to two days in advance.

Avocado Cucumber Salsa

  • Start by coating the chopped avocado with the juice of lemon, then add the remaining ingredients, stirring gently to not mash the avocado - this is more of a chopped salsa than a guacamole. Set aside until ready to use. If making ahead, make sure to cover with plastic wrap (direct contact to prevent oxidization). This will keep for a couple of days in the fridge.

Spicy Sriracha Sauce

  • In a small bowl, use a whisk to combine all ingredients until you have reached desired consistency. The buttermilk is only there to thin the mixture, feel free to substitute with a little water, or just leave it thicker. This can be done up to three days in advance, and also makes a great sandwich spread.

Bowls and Assembly

  • To serve, place 1/2 cup of rice in each bowl, top with chicken, avocado salsa, and any other desired toppings. Drizzle with the Spicy Sriracha Sauce and enjoy. These are great warm or at room temp.

Notes

As noted, all ingredients can be made in advance, so this is a great dinner party or busy weeknight dinner when needed.  
Parts of this recipe are loosely based on a few different ones from Half Baked Harvest, per usual!  
Continue Reading
1 4 5 6 7 8 10