Crunchy Pumpkin Spice Granola

Sweet and Salty Pumpkin Spice Granola with pecans and Maple.  Makes a great fall care package treat, or just something nice to have on hand for breakfast.

Pumpkin Spice seems to have become a triggering phenomenon for many – I get it.  It has no place in August, and really is something we should wait until October for in my opinion.  I have limited things I want it in, and this is one of them.  It fits – the granola just shines with these flavors, and the maple syrup is the perfect compliment to all the spice.  

The base of this recipe is not that far off my regular favorite, Best Batch Granola, which was one of my first posts on this blog.  https://walestable.com/best-batch-granola/.  It’s nutrient dense with all the nuts and seeds, but has the added health benefits from pumpkin puree, giving it a boost of Vitamin A and anti-oxidants such as alpha and beta-carotene.  Most importantly, it tastes GREAT!

Crunchy Pumpkin Spice Granola

Print Recipe
Sweet and salty pumpkin spice granola with pecans and maple
Course Breakfast, Salad, Lunch, Dinner, snack
Cuisine American
Keyword granola, pumpkin spice, pumpkin spice granola
Prep Time 10 minutes
Cook Time 40 minutes
Total Time 1 hour
Servings 16

Ingredients

  • 3 cups old fashioned rolled oats
  • 1 cup shredded coconut
  • 3/4 cup pumpkin seeds
  • 1 cup chopped pecans
  • 1 cup sliced almonds
  • 2 tsp ground cinnamon
  • 1 tsp pumpkin pie spice
  • 1/2 tsp salt
  • 2 large egg whites
  • 1/4 cup coconut oil, melted
  • 1/2 cup pumpkin puree
  • 1/2 cup maple syrup
  • 3 Tbsp packed light or dark brown sugar
  • 1 tsp pure vanilla extract
  • 2/3 cup dried cranberries optional

Instructions

  • Preheat oven to 325°. Line two large baking sheets with parchment paper, or spray with coconut oil.
  • In a large bowl, stir the oats, coconut, pumpkin seeds, pecans, almonds, cinnamon, pumpkin pie spice, and salt together until combined. Set aside.
  • In a medium bowl, whisk the egg whites for about 1 minute. Then whisk in the melted coconut oil, pumpkin puree, maple syrup, brown sugar, and vanilla until smooth and combined. Pour over dry ingredients and mix until everything is moistened.
  • Spread mixture out onto prepared baking sheets and bake for 40 minutes, making sure to stir the half way through to prevent burning.
  • Allow granola to cool for 1 hour on the baking sheets. Granola gets crunchier as it cools. Pour into a large bowl and stir in the dried cranberries.
  • Cover tightly and store at room temperature for up to 3 weeks. Granola will lose its crunch over time because of the wet pumpkin.

Notes

This recipe is a tweaked version of Sally's Baking Addiction, and I have added almonds, more coconut, pumpkin seeds, and more salt.  It's a great recipe; https://sallysbakingaddiction.com/pumpkin-spice-granola/#tasty-recipes-76142
Continue Reading

Pasta Alla Vodka with Pesto

A spicy pasta alla vodka with pesto and fresh basil.  The ultimate version of everyone’s favorite pasta recipe.

Pasta Alla Vodka sounds like a grown-ups only dish, but in reality it’s a dream for any crowd you can imagine.  The vodka cooks out, the sauce is insane, and kids like it as well as adults.  It also comes together in under 30 minutes, can be made ahead, and freezes if you want to really meal prep.  This sauce is the BOMB.  

The genius of pasta alla vodka lies in the simplicity of using high quality, big flavor ingredients that make a big impact on a humble dish – with a healthy dash of Tito’s….

Feel free to sub in your fave Vodka, or use chicken (or vegetable) stock in place if you prefer to avoid the booze.  It will still be AMAZING.  

I’ve tested dozens of versions of this iconic pasta dish, and this one is my personal favorite.  The pesto is optional, but lends a depth of flavor that is a nice addition – if you look closely in the ingredient photo, you’ll see Costco pesto. It’s one of my favorite things to buy there – it lasts forever, tastes almost as good as homemade, and is a shortcut I’m always happy to use.  

Pasta Alla Vodka with Pesto

Print Recipe
A spicy flavor packed pasta alla vodka Recipe
Prep Time 10 minutes
Cook Time 20 minutes
Total Time 30 minutes
Servings 4 people

Ingredients

  • 3 Tbsp olive oil
  • 1 shallot, minced
  • 4 cloves garlic, smashed and minced
  • 1 tsp dried oregano
  • 1 tsp crushed red pepper flakes
  • 1/2 cup tomato paste
  • 1/2 cup vodka
  • 1/2 cup basil pesto
  • kosher salt and black pepper
  • 1/2-3/4 cup heavy cream
  • 1 lb pasta - your choice!
  • 2 Tbsp salted butter
  • 1/2 cup grated parmesan cheese plus more for serving
  • 1/2 cup fresh basil, chopped or torn for serving

Instructions

  • Heat a large skillet over medium-low heat. When the oil shimmers, add the shallot, garlic, and oregano. Cook until the shallots begin to caramelize, about 5 minutes. Reduce the heat to low, add the tomato paste and red pepper flakes, cook 4-5 minutes, until thickened. Stir in the vodka, cook another 2 minutes. Stir in the pesto and cream. Season with salt and pepper. Keep warm over low heat.
  • Bring a large pot of salted water to a boil. Add the pasta and cook according to package directions until al dente. Just before draining, remove 1 1/2 cups of the pasta cooking water. Drain.
  • To the vodka sauce, add the pasta, 1/2 cup pasta cooking water, and the butter, tossing until the butter has melted. Add the parmesan and basil. If needed, thin the sauce with additional pasta cooking water.
  • Divide the pasta among plates and top with basil and cheese. Enjoy!

Notes

This recipe is tweaked from several versions, but most closely based on Tieghan Girard's Spicy Pesto Pasta Alla Vodka linked here - https://www.halfbakedharvest.com/spicy-pesto-pasta-alla-vodka/
If you want to avoid cooking with vodka you can substitute chicken or vegetable broth in the same quantity.  
This recipe is easy to make ahead as a sauce that you can store or freeze for make ahead meal prep.  
Continue Reading

Buffalo Cauliflower Bites with Yogurt Ranch

Spicy Baked Buffalo Cauliflower Bites served with Greek Yogurt Ranch Dip

Yet another Buffalo recipe, since we can’t get enough of it.  This one is a slightly tweaked version of Half Baked Harvest’s Buffalo Cauliflower with Spicy Tahini Ranch, and it’s AMAZING!  https://www.halfbakedharvest.com/buffalo-cauliflower/. We’ll call it “healthy-ish”, and might be the best way to enjoy a little extra veg as an after school snack!

The major adjustment here was to swap the Tahini ranch to a greek yogurt ranch, as I think the cool creamy yogurt is a better balance to the spicy heat of the tangy buffalo sauce.  You can use any kind of plain yogurt, but my favorite is full fat greek yogurt.  You can thin it with a couple of tablespoons of buttermilk or leave it thick and rich.  

The cauliflower is best fresh off the hot pan, but reheat well in a 325 degree oven for about 10 minutes as a great after school snack, or game day treat!

Here is a quick TikTok video of how to make these little bites!  https://www.tiktok.com/@walestable/video/7278048890941672750?_r=1&_t=8fdXZ1ooIbz

Buffalo Cauliflower Bites with Yogurt Ranch

Print Recipe
Spicy Oven Baked Buffalo Cauliflower with a Greek Yogurt Ranch Dip
Course Appetizer, dinner, Lunch, Salad, Lunch, Dinner, snack
Cuisine American
Keyword buffalo cauliflower, game day, marinated goat cheese, appetizer
Prep Time 20 minutes
Cook Time 30 minutes
Total Time 50 minutes
Servings 6

Ingredients

  • 1 large head cauliflower cut into florets
  • 3 extra large eggs
  • 1 1/2 cups crushed corn flake crumbs
  • 1 tsp paprika
  • 1/4 tsp cayenne pepper use to your taste
  • kosher salt and black pepper
  • 1/2 cup hot sauce (I use Frank's) I use Frank's
  • 1/3 cup melted butter or extra virgin olive oil
  • 1/2 tsp seasoned salt

Yogurt Ranch Dip

  • 1 cup Greek Yogurt (I prefer whole milk or full fat)
  • 1-2 Tbsp buttermilk (to thin the yogurt)
  • 2 tsp dried chives
  • 2 tsp dried parsley
  • 1 tsp dried dill
  • 1/2 tsp garlic powder
  • 1/2 tsp onion powder
  • 1/4 tsp cayenne pepper use to your taste
  • kosher salt and pepper to taste

Instructions

  • Preheat the oven to 425° F. Line a baking sheet with parchment paper.
  • Beat the eggs in a large bowl, add the cauliflower and toss well to coat. In a separate bowl combine the corn flake crumbs, paprika, cayenne, and a pinch each of salt and pepper.
  • Dredge the cauliflower through the crumbs, covering fully. Place on the prepared baking sheet. Repeat with the remaining cauliflower. Drizzle with olive oil, and bake for 20-25 minutes, turning the cauliflower halfway through cooking.
  • While the cauliflower is baking, whisk together the hot sauce, butter, seasoned salt, and a pinch of black pepper until smooth. After the 20-25 minutes are over, pull the cauliflower out and pour the sauce over, gently tossing to coat. Return to the oven for 5 minutes.
  • To make the yogurt ranch, combine everything in a bowl. Set aside - can be made ahead and chilled.
  • Serve the cauliflower with extra buffalo sauce and yogurt ranch on the side for dipping. Enjoy!

Notes

This recipe is slightly tweaked from Half Baked Harvest's Buffalo Cauliflower with Spicy Tahini Ranch, which can be found here: https://www.halfbakedharvest.com/buffalo-cauliflower/
Continue Reading

Labor Day Weekend Recipes

The best recipes from Walestable for the perfect end of summer celebration.  Below you’ll find what I think are the top 10 recipes from the archives, for whatever you have going on these next few days!  Appetizers, Salads, Dinners, and Desserts…

It doesn’t get much easier than this for a travel friendly, room temp happy, and crowd pleasing EASY app!  Herb marinated goat cheese uses whatever herbs you have in the garden or on hand (you can substitute dried here too if that’s what you’ve got!).  Just let it sit for a while before serving.  https://walestable.com/marinated-goat-cheese-appetizer/

Lunch on the beach, the boat, or just on the go calls for these tailgate dogs – it’s not even a recipe, just a post with a trick or two about keeping things warm and delicious with everyone’s favorite lunch – hot dogs!  https://walestable.com/make-ahead-tailgate-hot-dogs-picnic-food/

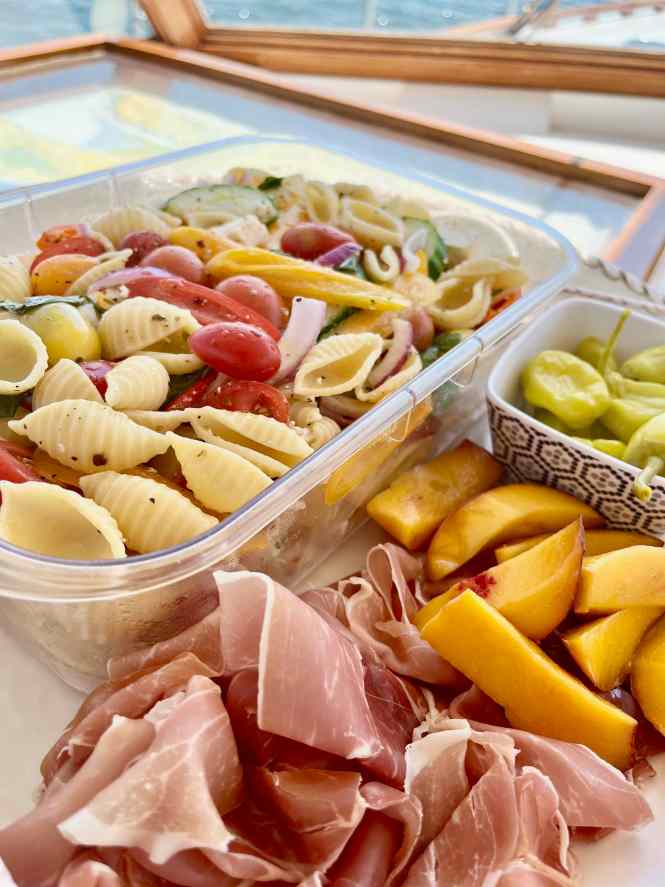
Greek Pasta Salad with Basil and Feta is another ideal summer salad that can sit at room temperature and goes with anything on the grill.  It also makes a great lunch with a side of sliced prosciutto and fresh peaches!  https://walestable.com/greek-pasta-salad-with-basil-and-feta/

MAINE.  LOBSTER.  ROLLS.  https://walestable.com/maine-lobster-rolls/

One of my favorite recipes on this blog to date, from long ago, and not to be forgotten – skillet pizza with corn, bacon, and chives.  https://walestable.com/skillet-pizza-with-corn-bacon-and-chives/

Spaghetti alla Nerano is a tweaked version of the famous La Scoglio favorite, made easier and faster, but just as delicious – a Walestable favorite!  https://walestable.com/spaghetti-alla-nerano/

Basil Chicken Saltimboca is my most recent post but so perfect for end of summer I had to include it here!  https://walestable.com/basil-chicken-saltimbocca-with-burst-tomatoes-and-burrata/

BBQ Chicken Meatball Burgers are a perfect fit for any time of year, especially Labor Day!  Healthier with ground chicken, and full of all the barbecue flavor you want.  https://walestable.com/bbq-chicken-meatball-burgers/

This is an olde recipe for Dark Chocolate Brownie Ice Cream Sandwiches, which is probably the my favorite dessert on this blog to date!  https://walestable.com/dark-chocolate-brownie-ice-cream-sandwiches/

Another recent one that deserves a spot in this round up, we’ll finish the dessert series for Labor Day with this treat that also makes a great lunchbox snack for the week ahead, if you have any leftover!  Retro Chocolate Peanut Butter Squares… https://walestable.com/retro-chocolate-peanut-butter-squares/

Because we needed a bonus recipe, this is the cocktail for the win!  Dark Rum Southside’s…  https://walestable.com/dark-rum-southsides-with-fresh-lime-juice/

Continue Reading

Basil Chicken Saltimbocca with Burst Tomatoes and Burrata

Prosciutto and Basil wrapped Chicken Cutlets bathed in burst cherry tomatoes and melty burrata cheese.

This dish is perfect for the end of summer.  It’s light, easy to make, and uses the tomatoes and basil that are at peak performance in late August.  It’s a recipe combining a few favorites, but mostly adapted from Half Baked Harvest’s version here: https://www.halfbakedharvest.com/basil-chicken-saltimbocca/

These are essentially your basic chicken cutlets on steroids, with the delicious addition of both prosciutto and fresh basil cooked under the breadcrumbs – it’s a flavor explosion that pairs so well with the tangy tomatoes and melty burrata – perfection!

The tomatoes melt into the skillet to create a delicious balance for the saltiness of the chicken and prosciutto.  It’s possible you may even win over tomato-haters with this.  I know some of those.

Basil Chicken Saltimbocca with Burst Tomatoes and Burrata

Print Recipe
Basil and Prosciutto Wrapped Chicken Cutlets bathed in roasted cherry tomatoes and melty burrata
Course dinner, Lunch
Cuisine Italian
Keyword caprese chicken, chicken cutlets, chicken saltimboca
Prep Time 15 minutes
Cook Time 20 minutes
Total Time 35 minutes
Servings 4 people

Ingredients

  • 4 boneless, skinless chicken breasts, pounded thin
  • kosher salt and black pepper
  • 8 thin slices prosciutto
  • 8 large fresh basil leaves, plus more for finishing
  • 2 large eggs
  • 1 cup Panko bread crumbs
  • 3/4 cup grated parmesan cheese
  • 1/3 cup olive oil
  • 2 Tbsp butter
  • 1 tsp red pepper flakes (to taste - optional)
  • 2 cloves garlic, minced
  • 2 large shallots, thinly sliced
  • 1 pint cherry tomatoes
  • 2 Tbsp white or regular balsamic vinegar
  • 1-2 Tbsp honey
  • 2 tsp fresh thyme leaves
  • 2 balls burrata cheese torn

Instructions

  • Sprinkle the chicken breasts with salt and pepper. Wrap each piece with 2 large basil leaves, and then prosciutto, like an envelope. This should adhere fairly easily.
  • Place the eggs in a shallow bowl, and beat with 1 Tbsp water. In another shallow bowl, combine the panko with the grated parmesan. One at a time, dredge the chicken breasts through the beaten egg wash, and then the breadcrumb mixture, setting on a plate until ready to cook.
  • Heat a large cast iron skillet over medium heat, and add 2 Tbsp of olive oil with 1 Tbsp of butter - cook the chicken two cutlets at a time, flipping when golden brown, about 5 minutes per side. Finish the chicken and set aside to make the tomatoes. Add more olive oil and 1 Tbsp of butter for cooking the second round.
  • In the same skillet, add 2 Tbsp more of olive oil, and toss in the shallots, garlic and red pepper flakes, followed by the cherry tomatoes. Cook for several minutes until the tomatoes burst their skins and start to loosen a bit. Add the balsamic, a touch of honey, and the fresh thyme leaves. You should be left with a silky sauce surrounding the tomatoes.
  • To serve, plate each cutlet with a small mound of the tomatoes and sauce, and finish with fresh burrata and torn basil leaves. Enjoy!

Notes

This recipe is adapted from one at Bon Appetite, and then mostly from this one at Half Baked Harvest https://www.halfbakedharvest.com/basil-chicken-saltimbocca/
Continue Reading

Retro Chocolate Peanut Butter Squares

Peanut Butter Chocolate perfection in a classic childhood treat!   It’s just about care package season, and while these won’t ship well, they will be available for local delivery!

It’s almost time for back to school cooking, but before we hit full stop on summer, I’m posting this recipe that reminds me of my own childhood.  I was lucky to spend my summers at Ocean Point in Boothbay Harbor, where life was at a slower pace.  I have many fond memories of making these no bake treats with my friends.  Apparently sometimes we did this in houses without the adults around, as noted in the recipe from the Ocean Point Cookbook pictured below.  

This recipe has been tweaked a bit for some extra graham cracker flavor, and a touch less sugar in the ratio – still just as delicious, and the right balance of salty and sweet.  These would make an excellent snack for the first day of school too!  

If you want to see a quick video of these being made, click this link: https://www.tiktok.com/@walestable/video/7268029208004136234?_r=1&_t=8euvyaLwD66


Retro Chocolate Peanut Butter Squares

Print Recipe
A classic take on the no bake chocolate peanut butter bar everyone loves
Course Dessert
Cuisine American
Keyword chocolate peanut butter bar, peanut butter bars
Prep Time 15 minutes
30 minutes
Total Time 45 minutes
Servings 16

Ingredients

  • 2 cups graham cracker crumbs (from about 2 sleeves of graham crackers)
  • 2 cups confectioners' sugar
  • 1 cup butter - melted
  • 1 cup smooth peanut butter
  • 1 ½ cups semisweet chocolate chips
  • 4 Tbsp smooth peanut butter

Instructions

  • In a large micro-wave safe bowl, melt the two sticks of butter. Stir in the cup of peanut butter, then add the graham cracker crumbs and confectioners' sugar until well-blended. Press evenly into the bottom of an ungreased 8x8" baking pan.
  • Place chocolate chips and 4 tablespoons peanut butter in a microwave-safe bowl. Microwave on high, stirring every 30 seconds, until smooth (usually about 2 mins total). Spread mixture over crust.
  • Refrigerate for 30-60 minutes before cutting into 16 squares.

Notes

This recipe is based on my childhood favorite summer treat, the no bake chocolate peanut butter bars I used to make with friends.  It's a great recipe to make with kids, and comes together with only a handful of pantry ingredients.
Continue Reading

Thai Chicken Lettuce Wraps

Spicy Ground chicken, bathed in a soy and hoisin sauce and wrapped in butter lettuce leaves – the perfect easy healthy dinner for any summer night.

This recipe has becoming something I make every week over the past year, mostly due to its versatility and incredible ability to sit for days in the fridge, only getting better with time.  It’s a healthy, easy to make dish that works for lunch or dinner, and works well as a rice bowl too.  I tend to make things spicy, so scale it back a bit if you tend to prefer less heat. 

The best part about this easy dinner is that it comes together in about 10 minutes.  You simply brown the ground chicken and add the sauce, and you are done!  

Thai Chicken Lettuce Wraps

Print Recipe
Spicy Ground Chicken Bathed in a soy hoisin sauce, wrapped in butter lettuce leaves.
Course dinner, Lunch
Cuisine Thai
Prep Time 10 minutes
Cook Time 10 minutes
Total Time 20 minutes
Servings 4 people

Ingredients

  • 2 Tbsp olive oil
  • 1 pound ground chicken (ground turkey works too)
  • 1 onion, small diced
  • 3 cloves garlic, minced
  • 1/3 cup hoisin sauce
  • 2-3 Tbsp soy sauce
  • 1 Tbsp rice wine vinegar
  • 1 Tbsp freshly grated ginger
  • 1-2 Tbsp Asian Chili Paste - Sriracha can be substituted
  • 1 8-ounce can whole water chestnuts, drained and diced
  • 1/4 cup chopped scallions
  • Kosher salt and freshly ground black pepper to taste
  • 1/4 cup chopped cilantro
  • 2 Tbsp sesame seeds
  • 1 head butter lettuce
  • 2 cups cooked Jasmine Rice optional for serving

Instructions

  • Heat olive oil in a large skillet over medium high heat. Add ground chicken and cook until browned. Add the chopped onion, cooking until slightly soft. Add the garlic, and cook for one minute before adding the sauce.
  • To make the sauce, combine the hoisin sauce, soy sauce, rice wine vinegar, ginger and chili paste - add to the cooked chicken mixture and simmer for about 3 minutes.
  • When the sauce has reduced a bit, turn off the heat and stir in the chestnuts and green onions, allowing the hot chicken to soften them. At the finish point, top the mixture with the chopped cilantro and sesame seeds.
  • To serve, spoon several tablespoons of the chicken mixture into the center of a lettuce leaf, taco-style. Use rice if you like to add some heft to the dish.

Notes

This recipe is a tweaked version of many found on the internet copying the iconic PF Chang dish.  I have adjusted things here and there, and make this weekly - it feeds a crowd, and sits well in the fridge.  
Continue Reading

Charred Corn Salad with Creamy Shallot Dressing

Charred corn, tossed with arugula, tomatoes, and a creamy shallot dressing.

When corn is in season, I’m always looking for ways to incorporate it into summer dinners.  This salad is a twist on one I’ve been making for years, and has the added creaminess from a dollop of greek yogurt. This gives the salad a hint of the ever popular Elote corn craze, and takes everything up a notch.  

The trick to making this salad is charring the corn, but only for about a minute.  You want to blister the outsides of the kernels only a tiny bit, This will allow the corn to maintain a bit of a bite.  It’s also important to allow the corn to fully cool before tossing with the dressing and arugula.  It’s best when just tossed, so if you need to make it ahead, wait to assemble everything later.  The dressing can easily be made a day before.

Charred Corn Salad with Creamy Shallot Dressing

Print Recipe
Charred Corn tossed with arugula, tomatoes and a creamy shallot dressing
Course dinner, Lunch
Cuisine American
Keyword corn salad, summer salad
Prep Time 5 minutes
Cook Time 5 minutes
Total Time 10 minutes
Servings 6 people

Ingredients

  • 5 Tbsp olive oil, divided
  • 6 ears fresh corn, husked and kernels removed from cobs
  • 1 shallot, sliced thin into rings
  • 1/2 tsp red pepper flakes
  • kosher salt and black pepper
  • 5 Tbsp fresh squeezed lime juice (2 limes)
  • 2 Tbsp whole milk greek yogurt
  • 1/2 pint small cherry or grape tomatoes, halved
  • 4 oz baby arugula
  • 1/4 cup ground parmesan

Instructions

  • Heat a large cast iron skillet over medium high heat. When hot, add 1 Tbsp olive oil to the pan, and add the corn kernels, stirring frequently until slightly blistered and barely softened. You want to maintain a little bite to the corn, so don't fully cook them, one to two minutes total. Remove from the heat and toss with a little salt, pepper, and red pepper flakes in a large bowl for the salad.
  • To make the dressing, toss the sliced shallots into a bowl with the lime juice, some salt and pepper. Let this stand for at least 5 minutes, and up to one hour. Add the yogurt and remaining 4 Tbsp olive oil, stirring to combine into a creamy consistency.
  • When ready to serve, combine the arugula and tomatoes with the charred (and cooled) corn kernels, and toss with the dressing and grated parmesan cheese. Give a final grind of black pepper, and enjoy!

Notes

This recipe is a twist on a charred corn salad from Bon Appetite, and the dressing is undeniably delicious.  
Continue Reading

Confetti White Chocolate Chip Rice Krispie Treats

Rice Krispie Treats stuffed with White Chocolate chips and confetti sprinkles.

A fun and easy no-bake treat for all your summer celebrations – the treat that makes kids of all ages smile!  A little upgradee for this old school favorite, comes from Broma Bakery, with flecks of sprinkles and white chocolate chips throughout.  https://bromabakery.com/funfetti-rice-krispie-treats

This comes together in minutes, and requires only chilling time to set after you melt the marshmallows.  It couldn’t be simpler, and is perfectly festive for the upcoming Fourth of July!

Two tips I took from this recipe which I will use going forward with my Rice Krispie treats are, 1 – instead of adding the mixture to the hot pan, pour the melted butter and marshmallow to a mixing bowl and stir in the cereal off the heat, and 2 – mix gently with the sprinkles, as they can melt and turn into a rainbow mess!  

Confetti White Chocolate Chip Rice Krispie Treats

Print Recipe
Rice Krispie Treats stuffed with confetti sprinkles and white chocolate chips
Course cookie, Dessert, Drinks, sweet
Cuisine American
Keyword confetti, funfetti, rice krispie treats
Prep Time 10 minutes
20 minutes
Total Time 30 minutes
Servings 16 people

Ingredients

  • 1/2 cup salted butter
  • 16 ounces marshmallows
  • 6 cups rice krispies cereal
  • 1/3 cup rainbow sprinkles plus more for topping
  • 1 cup white chocolate chips

Instructions

  • Line a 9×9 pan with parchment paper and then grease with cooking spray. Set aside.
  • In a small saucepan over medium heat, melt the butter. Add in the marshmallows and stir with a spatula until fully melted. Remove from the heat immediately.
  • Pour the marshmallow mixture into a large mixing bowl and add the rice krispies cereal. Use a rubber spatula to fold together until evenly coated. It helps to coat the spatula with cooking spray too.
  • Gently fold in the rainbow sprinkles and the white chocolate chips.
  • Transfer the mixture into the prepared pan and use a greased rubber spatula to spread the mixture into an even layer. You can also put a little butter on your fingertips and press the mixture into an even layer.
  • If desired, top with more white chocolate chips and sprinkle with a few more sprinkles.
  • Place in the fridge to set before cutting into 16 squares. Enjoy!

Notes

This is a great recipe from Broma Bakery - thank you Sarah!  https://bromabakery.com/funfetti-rice-krispie-treats/
Continue Reading

Puff Pastry Quiche

Fluffy Quiche baked into a buttery puff pastry crust.

Today’s recipe is great for any meal of the day – breakfast, lunch or dinner, and can be made ahead for easy summer entertaining.  Make it for Father’s Day and fill it with whatever you want – it’s a flexible base recipe that works in many ways!

I needed an easy lunch to feed some friends, and was leaning toward a frittata, but wanted something a little more special.  I also didn’t want to spend time making a crust from scratch, and figured I’d see if I could make puff pastry work as a base for what ended up being a really easy trick!  If you have worked with puff pastry before, you know it’s forgiving, and more importantly, DELICIOUS!  

Some great things to serve along side this dish are prosciutto wrapped melon, a green salad, or chopped tomatoes tossed with basil, lemon and olive oil.  Have fun with the fillings – this works with whatever you have lying around!

Puff Pastry Quiche

Print Recipe
Fluffy Quiche baked into a buttery puff pastry crust.
Course Breakfast, brunch, dinner, Lunch
Cuisine American
Keyword puff pastry, quiche
Prep Time 15 minutes
Cook Time 40 minutes
10 minutes
Total Time 1 hour 15 minutes
Servings 8

Ingredients

  • 2 Tbsp olive oil
  • 1 4 oz package diced pancetta
  • 1/2 yellow onion, diced
  • 3 oz chopped baby spinach
  • Kosher salt and freshly ground black pepper
  • 9 large eggs
  • 1 1/2 cups half-and-half, or whole milk
  • 3/4 cup sour cream
  • One 17.3-ounce package 2 sheets frozen puff pastry, thawed
  • 2 cups shredded cheddar cheese

Instructions

  • Preheat the oven to 375 degrees.
  • In a skillet over medium-high heat, add the olive oil and sauté the onion with the pancetta cooking until the onions are softened and the pancetta has crisped a bit. Add the spinach, stirring to wilt, then remove from the heat to cool a bit.
  • In a large bowl, whisk the eggs, half-and-half, sour cream, salt and pepper.
  • Spread each sheet of puff pastry on a floured surface, and using a rolling pin, stretch the pastry about an inch in each direction. The goal is to make the pastry wide enough to go up the sides of a 9 x 13 baking dish. You will end up using about 1 1/2 of the 2 sheets in total. As you place the pastry in the dish, push the edges up to form a crust that will hold the egg mixture. You will need the second piece to complete this, and can simply press the sheets together to form a light seal. Discard the leftover, or save for another use.
  • Top the pastry with the shredded cheddar cheese, then the sautéed onion mixture, and finally fill the dish with the egg mixture. Cover with tinfoil. Carefully transfer the dish to the oven, and baked covered for 20 minutes. Remove the foil, and bake for another 20-25 minutes until the filling has set and the pastry is golden on the edges. The eggs will look very runny when you remove the foil - don't worry - it will all work out!
  • Allow to sit for 10 to 15 minutes before serving. Top with lightly dressed arugula salad, or chopped tomatoes with basil.

Notes

This recipe mimics the fillings of my favorite mini muffin frittata's, and just happens to be what I have on hand.  You can adjust the fillings for whatever you like - grilled vegetables, ham, etc...  
Continue Reading
1 4 5 6 7 8 17