White Chocolate Brownies

Salty but sweet white chocolate brownies.  Perfect for the Kentucky Derby or Cinco De Mayo this weekend!

Some people don’t love chocolate.  While I’m not one of them, I can imagine this brownie is going to be a favorite of those that fall into that category.  To miss out on the moist chewy brownie dessert all together is a tragedy, and now the void is filled!  Don’t worry about them being too sweet either – the white chocolate flavor is subtle, and balanced perfectly by the salt and depth of richness from the sweetened condensed milk.  These easy one-bowl brownies are a true hit – they would also make a great care package, or Mother’s Day treat!

This recipe comes from Broma Bakery, a great resource for anything dessert related.  https://bromabakery.com/white-chocolate-brownies-recipe/

White Chocolate Brownies

Print Recipe
A salty sweet white chocolate brownie
Course Dessert, Snack
Cuisine American
Prep Time 10 minutes
Cook Time 25 minutes
Total Time 35 minutes
Servings 9 servings

Ingredients

  • 1/2 cup butter room temperature
  • 1 cup white chocolate chips
  • 1 large egg room temperature
  • 1 14 oz can sweetened condensed milk
  • 1 Tbsp vanilla extract
  • 1 tsp salt (I use Morton's Kosher)
  • 1 1/2 cups all-purpose flour
  • 1/4 cup powdered sugar for topping

Instructions

  • Preheat oven to 350°F. Line an 8″x8″ dish with parchment paper and set aside.
  • In a microwave-safe bowl, combine butter and white chocolate chips and microwave for 30 seconds. Stir the mixture until completely melted (if not melted, give it another 10-15 seconds). It may be al little lumpy, but don't worry - the mixture will combine well with the next ingredients to become smooth.
  • Add in egg, sweetened condensed milk, vanilla extract, and salt, stirring to combine. Fold in flour, stirring until just combined.
  • Pour mixture into prepared pan and bake for 22-25 minutes. It should be puffed up in the middle. This will sink back down when you remove it from the heat. Remove from oven, allow to cool in pan for 10 minutes, then transfer the brownies out of the pan and onto a cooling rack. Allow to cool completely before serving.

Notes

It's important to slightly underbake these as they will continue to cook in the pan after they come out of the oven.  This recipe is from Broma Bakery, and it's absolutely delicious, in addition to being very simple to make!  Thanks Sarah!  https://bromabakery.com/white-chocolate-brownies-recipe/
 
Continue Reading

Sagaponack Corn Pudding

The ultimate corn pudding, from the Barefoot Contessa.  Sometimes the oldest recipes you know get forgotten, and it’s like seeing an old friend again.  Hello Sagaponack Corn Pudding!

This recipe makes a brilliant dish that honestly works for breakfast, lunch or dinner.  It’s a cross of a delicious crustless quiche, and a giant thick frittata, but fluffier and cheesier than both of those combined.  It is easy to make ahead, and great for a gathering all summer long.  It goes great with Tequila Lime Chicken, another recipe to come soon.

The recipe relies upon fresh corn, but if you absolutely cannot find it, I would skip the sautéing and just cook the onions, then add frozen corn (which is pre-cooked) to the recipe and I’m sure it would work great.  The dish bakes in a Ban Marie, (a hot water bath) almost like a cheesecake, helping with even cooking.  It may seem complicated but its incredibly simple and easy to do.

Sagaponack Corn Pudding

Print Recipe
Course brunch, dinner, Lunch
Cuisine American, Mexican
Keyword corn pudding
Prep Time 25 minutes
Cook Time 45 minutes
Total Time 1 hour 10 minutes
Servings 6

Ingredients

  • 4 Tbsp butter
  • 5 cups fresh yellow corn kernels cut off the cob 6 to 8 ears
  • 1 cup chopped yellow onion 1 onion
  • 4 extra-large eggs
  • 1 cup whole milk
  • 1 cup half-and-half
  • 1/2 cup yellow cornmeal
  • 1 cup ricotta cheese
  • 3 Tbsp chopped fresh basil leaves, plus more for topping
  • 1 Tbsp sugar
  • 1 Tbsp kosher salt
  • 3/4 tsp freshly ground black pepper
  • 8 oz grated extra-sharp cheddar, plus extra to sprinkle on top

Instructions

  • Preheat the oven to 375 degrees F. Grease the inside of an 8 to 10-cup baking dish.
  • Melt the butter in a very large saute pan and saute the corn and onion over medium-high heat for 4 minutes. Cool slightly.
  • Whisk together the eggs, milk, and half-and-half in a large bowl. Slowly whisk in the cornmeal and then the ricotta. Add the basil, sugar, salt, and pepper. Add the cooked corn mixture and grated cheddar, and then pour into the baking dish. Sprinkle the top with more grated cheddar.
  • Place the dish in a larger pan and fill the pan 1/2 way up the sides of the dish with hot tap water. Bake the pudding for 40 to 45 minutes until the top begins to brown and a knife inserted in the center comes out clean. Serve warm, sprinkled with more fresh basil.

Notes

This is a slightly adapted version of the classic Barefoot Contessa recipe from her Family Style Cookbook - here is the link to her site: https://barefootcontessa.com/recipes/sagaponack-corn-pudding
I have cut the butter in half, trying to lighten the dish a bit - I added 2 more ounces of cheddar, helping to make up for some extra flavor - the recipe works great with the butter change, but you can always add more if you like!
Continue Reading

English Cream Scones with Chocolate Chips

Buttery Cream Scones flecked with tiny dark chocolate chips.  A spin on Ina’s English Cream Scones, I swapped the currants for chocolate chips.  The exchange is delicious, despite the less authentic approach.  https://www.foodnetwork.com/recipes/ina-garten/english-cream-scones-13126809

This recipe is adaptable, clearly.  The currants are traditional and clearly a popular choice, but the outspoken customer base in my kitchen definitely prefers chocolate to “tiny hard raisins.”  Sorry currants.  

English Cream Scones with Chocolate Chips

Print Recipe
Buttery English Cream Scones with Mini chocolate chips

Ingredients

  • 4 cups plus 1 tablespoon all-purpose flour
  • 3 Tbsp sugar plus additional for sprinkling
  • 2 Tbsp baking powder
  • 1 tsp Kosher salt
  • 3/4 pound cold unsalted butter grated then frozen
  • 4 extra-large eggs
  • 1 cup cold heavy cream
  • 3/4 cup mini chocolate chips
  • 1 egg beaten with 2 tablespoons water or milk for egg wash

Instructions

  • Preheat the oven to 400 degrees F.
  • To prep the butter, using a box grater, shred the butter into a pile of shavings, and keep in the freezer while you get the rest of the ingredients going. If you don't have a box grater, a fine dice works fine too.
  • In the bowl of an electric mixer fitted with a paddle attachment, combine the 4 cups of flour, 3 tablespoons sugar, baking powder, and 1 teaspoon salt. Add the butter and mix on the lowest speed until it is well incorporated. Whisk together the eggs and heavy cream and, with the mixer on low, quickly add them to the flour-and-butter mixture, combining just until blended. Toss the chocolate chips with the 1 tablespoon flour, add them to the dough, and mix quickly to distribute the chips through the dough. The dough may be a quite sticky.
  • Dump the dough out onto a well-floured surface and knead quickly to be sure the ingredients are combined. Flour your hands and a rolling pin and roll the dough 3/4-inch thick. You should see lumps of butter in the dough. Cut with a 3-inch plain round cutter and place the circles on two sheet pans lined with parchment paper.
  • Brush the tops of the dough with egg wash. Sprinkle with sugar and bake for 20 to 25 minutes, until the tops are browned and the insides are fully baked. Serve warm.

Notes

This is a tweaked version of the Barefoot Contessa's English Cream Scones https://www.foodnetwork.com/recipes/ina-garten/english-cream-scones-13126809.  I changed several ingredients, swapping mini chocolate chips for the currants, much less salt, a little more sugar, and grated the butter instead of dicing.  
Make ahead: Assemble and cut out scones and refrigerate for up to 2 days or freeze for up to 4 months. Defrost overnight in the fridge and bake before serving.
Continue Reading

Legendary Lemon Bars

A legendary dessert with a buttery shortbread base and a tangy lemon curd top.  This is a fan favorite from the Barefoot Contessa archives – worthy of frequent repeats, especially this time of year. 

This recipe comes from one of my favorite Ina cookbooks, Parties, and is something I’ve made for years.  The lemon zesting and juicing is the only laborious part, but it’s worth it.  These bars freeze well too, so you can make them ahead and keep them ready for a party anytime.  

The recipe makes a large batch, and the dense richness of these makes small bites ideal for consumption – this will feed a crowd!  To freeze, do so on a tray, and then wrap individually in plastic wrap – you can also freeze the entire slab if you have room for that. Then cut after defrosting at room temp for about 30 minutes.  

Legendary Lemon Bars

Print Recipe
Legendary lemon shortbread bars from the Barefoot Contessa - the ultimate spring dessert
Course cookie, Cookies
Cuisine American
Keyword lemon bar
Prep Time 15 minutes
Cook Time 30 minutes
Total Time 50 minutes

Ingredients

For the Crust

  • 1/2 pound butter at room temperature
  • 1/2 cup granulated sugar
  • 2 cups all-purpose flour
  • 1/8 teaspoon kosher salt

For the Filling

  • 6 extra-large eggs at room temperature
  • 3 cups granulated sugar
  • 2 Tbsp grated lemon zest 4 to 6 lemons
  • 1 cup freshly squeezed lemon juice
  • 1 cup all-purpose flour
  • Confectioners’ sugar for dusting

Instructions

  • Preheat the oven to 350 degrees.
  • For the crust, cream the butter and sugar until light in the bowl of an electric mixer fitted with the paddle attachment. Combine the flour and salt and, with the mixer on low, add to the butter until just mixed. Dump the dough onto a well-floured board and gather into a ball. Flatten the dough with floured hands and press it into a 9 x 13 x 2-inch baking sheet, building up a 1/2-inch edge on all sides. Chill.
  • Bake the crust for 15 to 20 minutes, until very lightly browned. Let cool on a wire rack. Leave the oven on.
  • For the filling, whisk together the eggs, sugar, lemon zest, lemon juice, and flour. Pour over the crust and bake for 30 to 35 minutes, until the filling is set. Let cool to room temperature.
  • Cut into triangles and dust with confectioners’ sugar.

Notes

The fan favorite, Ina's Lemon Bars hit all the notes of delicious shortbread base and lemony curd filling - this is the ultimate spring dessert.  https://barefootcontessa.com/recipes/lemon-bars
 
Continue Reading

Genius Chicken Salad

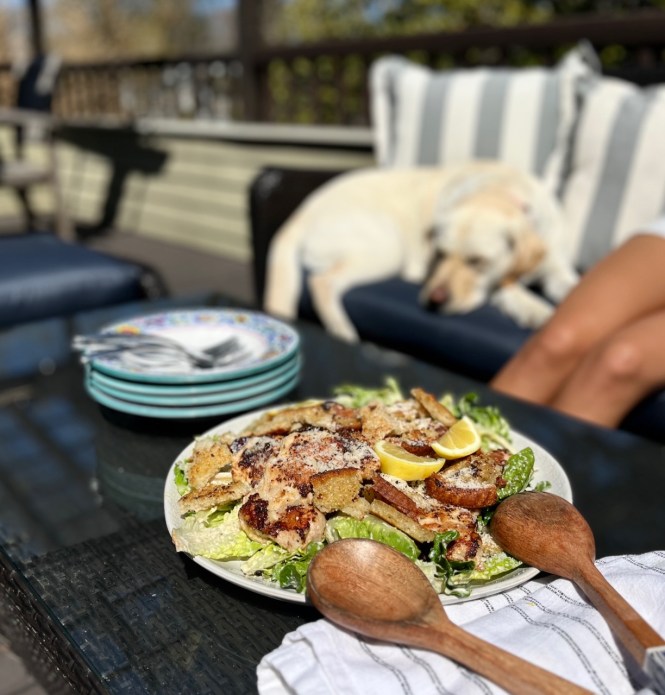
A caesar inspired salad with sourdough croutons and chicken thighs.   As the weather turns warmer, this is the kind of thing you want for dinner and lunch the next day, so make extra!

Food52 is a website that has a section of recipes edited by Kristen Miglore that she deems “Genius.”  This is one of them, and I couldn’t agree more.  The dressing doubles as a marinade, and the sourdough slice of bread makes the best and easiest croutons ever – no flipping tiny cubes of bread for even cooking.  GENIUS.  

Per usual, I’ve tweaked this for my own tastes (and that of my kids) by removing the anchovies, replacing that with 2 tsp of Worcestershire sauce. It gives the same salty bite without the fishy taste.  I have made it both ways, and like my version better – it’s also easier than buying a tin of anchovies for just this salad.  

Genius Chicken Salad

Print Recipe
A caesar inspired salad with chicken thighs

Ingredients

  • 3 garlic cloves
  • 2 tsp Worcestershire sauce
  • 3/4 cup grated parmesan divided
  • 1 lemon
  • 1 cup mayo
  • 1 teaspoon soy sauce
  • 2 teaspoons Dijon mustard
  • 1 pound boneless, skinless chicken thighs
  • A few small heads crisp lettuces like Little Gem, romaine, or chicories
  • 2 - 4 tablespoons olive oil for cooking both the chicken and croutons
  • 2-3 thick slices of sourdough bread for croutons

Instructions

  • Finely chop the three garlic cloves. Transfer to a medium bowl. Finely grate ¾ cup Parmesan (about 1½ ounces) and add ½ cup to the bowl. Zest half of the lemon into the bowl. Stir in the mayo, soy sauce, Worcestershire ,and Dijon mustard, using a large whisk.
  • Transfer half the dressing to a shallow dish. Pat the chicken thighs dry, season with salt & pepper, then add to the dish and turn to coat.
  • Heat a large nonstick skillet over medium heat, and add two tablespoons olive oil when ready. Add the chicken and cook until golden brown and juices run clear, about 5 minutes per side. Transfer the chicken to a cutting board.
  • Separate the leaves of the lettuces and toss into a big bowl. Squeeze half the lemon (about 1½ tablespoons) over the greens, sprinkle with salt, then toss to combine. Add the remaining dressing and remaining ¼ cup Parm and toss to combine. Thinly slice the chicken. Add to the salad and season to taste with salt and pepper, lemon, and Parm.
  • For croutons, heat the olive oil in the skillet over medium-high (any flaky brown bits leftover from the chicken will add flavor). Add the slices of crusty bread and toast until golden brown, 2 to 3 minutes per side. Transfer to a cutting board and season with salt. Cut into croutons and sprinkle over the salad.

Notes

This salad comes from the Food52 website, where Kristen Miglore showcases what she considers to be Genius Recipes - they have always been foolproof for me, and this one is easy and quick, and deceptively delicious.  The simplicity of the marinade/dressing saves time and makes for easy prep.  The original recipe (tweaked here with a few changes) came from Ali Slagle.  https://food52.com/recipes/87742-not-just-another-chicken-caesar-salad-from-ali-slagle
Continue Reading

Iced Lemon Loaf Cake

A simple delicious buttery lemon cake with loads of flavor, and a DOUBLE glazed topping.  

This recipe is a Barefoot Contessa classic – the original makes two loaves, which I have cut in half as normally one doesn’t need two cakes at once.  It clearly doubles well if you do!  This is a more delicious and preservative free version of a very popular cake at a coffee shop you might be familiar with…  Just saying Ina know best!

Not one, but two layers of lemony glaze make the flavor intense and keeps the cake incredibly moist for days.  This makes a fabulous gift and seems to me the perfect easter brunch treat.

Iced Lemon Loaf Cake

Print Recipe
A simple buttery lemon cake glazed with fresh lemon juice.
Course brunch, Dessert
Cuisine American
Keyword easter dessert, lemon cake, lemon loaf, mother's day, spring cake
Prep Time 15 minutes
Cook Time 50 minutes
1 hour 5 minutes
Servings 8 people

Ingredients

  • 1 stick butter room temp
  • 1 1/4 cups granulated sugar divided
  • 2 extra-large eggs at room temperature
  • zest from 3 large lemons about 2.5 Tbsp
  • 1 1/2 cups flour
  • 1/4 tsp baking powder
  • 1/4 tsp baking soda
  • 1/2 tsp kosher salt
  • 6 Tbsp freshly squeezed lemon juice divided
  • 6 Tbsp buttermilk at room temperature
  • 1/2 tsp vanilla

For the Glaze

  • 1 cup confectioner's sugar sifted
  • 2 Tbsp tablespoons freshly squeezed lemon juice

Instructions

  • Preheat the oven to 350 degrees F. Grease and flour a 8 x 4 loaf pan, then line it with parchment paper.
  • Cream the butter and 3/4 cup granulated sugar in the bowl of an electric mixer fitted with the paddle attachment, until light and fluffy, about 5 minutes. With the mixer on medium speed, add the eggs, 1 at a time, and the lemon zest.
  • Sift together the flour, baking powder, baking soda, and salt in a bowl. In another bowl, combine 2 Tbsp lemon juice, the buttermilk, and vanilla. Add the flour and buttermilk mixtures alternately to the batter, beginning and ending with the flour. Dump the batter into the prepared loaf pan, smooth the top, and bake for 45 minutes to 1 hour, until a cake tester comes out clean.
  • Combine 1/4 cup granulated sugar with 1/4 cup lemon juice in a small saucepan and cook over low heat until the sugar dissolves. When the cakes are done, allow to cool for 10 minutes. Remove the cake from the pan and set on a rack over a sheet pan; spoon the lemon syrup over them. Allow the cake to cool completely.
  • For the glaze, combine the confectioners' sugar and 2 Tbsp lemon juice in a bowl, mixing with a wire whisk until smooth. Pour over the tops of the cakes and allow the glaze to drizzle down the sides.

Notes

This recipe is from the Barefoot Contessa - I halved everything to make one cake.  It freezes well and sits well for a few days, though is best when eaten in 48 hours.  https://www.foodnetwork.com/recipes/ina-garten/lemon-cake-recipe-1913110
 
Continue Reading

Funfetti Sugar Cookies

Buttery sugar cookies flecked with colorful rainbow sprinkles – the perfect treat for Easter.  My youngest requests a funfetti cake for her birthday every year, so this one’s for you Annie!  Even better than the box mix…

This dough comes together quickly, but is best baking after being chilled for an hour – otherwise they spread too thin on the baking sheet.  Take the time to make ahead, and you can even freeze the unbaked cookies so they’re ready anytime you need a quick treat.

I tested several different recipes for this variation, and this cookie stands out as a simple sugar cookie as well – it would be delicious with a little buttercream on top if you need a reason to dress it up.  

Funfetti Sugar Cookies

Print Recipe
Buttery sugar cookies flecked with rainbow sprinkles
Course Cookies, Dessert
Cuisine American
Prep Time 15 minutes
Cook Time 10 minutes
1 hour
Total Time 1 hour 25 minutes
Servings 20 cookies

Ingredients

  • 3/4 cup butter room temperature
  • 3/4 cup plus 1 TBSP granulated sugar
  • 1/2 cup light brown sugar packed
  • 1 extra large egg room temperature
  • 1 tsp vanilla
  • 2 1/4 cups all-purpose flour
  • 3/4 tsp baking soda
  • 1/2 tsp cream of tartar
  • 1/2 tsp kosher salt
  • 1/3 cup rainbow sprinkles

Instructions

  • Line two baking sheets with parchment paper. Set aside.
  • In the bowl of a stand mixer fitted with the paddle attachment, cream together the butter and sugars on medium high speed until light and fluffy, about 2-3 minutes.
  • Add the egg and vanilla. Mix on low speed until fully incorporated.
  • In a separate bowl, whisk together the flour, baking soda, cream of tartar, and salt.
  • Add the dry ingredients to the wet ingredients and mix on low speed just until combined. Do not over mix.
  • Remove the bowl from the stand mixer and stir in the rainbow sprinkles by hand with a spatula or wooden spoon, being careful not to over mix the dough.
  • Using a medium sized cookie scoop, scoop out the dough and place onto one of the prepared baking sheets. Refrigerate uncovered for one hour.
  • Once dough is chilled, preheat oven to 350 degrees.
  • Place cookie dough onto lined cookie sheet, spacing 2 to 3 inches apart. Bake for 9 to 11 minutes. The cookies are done when the edges just begin to turn golden brown and the centers look slightly under baked. The cookies will continue to bake as they cool.
  • Remove the pan from the oven and allow the cookies to cool on the cookie sheet for 5 minutes before transferring to a cooling rack to cool completely.
  • Store in an airtight container for several days, or freeze for later.

Notes

This recipe is from the blog Brown Butter Blondie - the dough freezes well and you can also freeze the fully baked cookies - these will make the perfect treat for Easter or Mother's Day!  
Continue Reading

Spring Green Risotto

The Ultimate spring risotto with asparagus and peas, from the Barefoot Contessa.  This is one of my all time favorite recipes, and after years on repeat, I’m not tired of it in the least.  It’s the dish my sweet mother-in-law requests more than any other (aside from the lemonade cake!) and I’m always happy to make it – thank you INA!  

This is one of those recipes that doesn’t have room for change.  It’s just that good, and that reliable.  That said, I have figured out over many years of making this, one tiny step of improvement – one I think the Barefoot Contessa would approve of highly.  

Sometimes posting recipes from other cookbooks feels like cheating, but I often have minor changes and try to give credit where it’s due.  This is a good example, except I really don’t change any ingredients.  Just one step in the process.  I dislike blanching green veggies, and fishing out the slivers of ice cubes that reside at the end of the ice bath stage.  

This risotto is so full of fresh green veggies, I use frozen peas here.  Instead of defrosting them ahead of time, I place them in a bowl of cold tap water while blanching the asparagus, and simply add the drained asparagus to the now very chilled ice water bath of slowly defrosting peas.  The result is that the hot asparagus defrosts the peas fully, and the little cold peas shock the bright green color to the asparagus tips!  No lame slivery ice cubes to slide into a risotto without being noticed here…

Ultimately, the genius of this recipe comes from the combined elements of bright green vegetables bathed in silky rice that has the added benefits of nutty parmesan, creamy mascarpone, and loads of spring flavor in the bright lemon juice and zest.  It’s a perfectly balanced gem that deserves the spotlight year round, but especially right now – this screams spring.  

Spring Green Risotto

Print Recipe
the Ultimate Spring Risotto by the Barefoot Contessa
Course dinner, Lunch, Main Course
Cuisine Italian
Keyword risotto, spring risotto, spring green risotto, asparagus
Prep Time 10 minutes
Cook Time 35 minutes
Total Time 45 minutes
Servings 4

Ingredients

  • 2 Tbsp Butter
  • 1 Tbsp Olive Oil
  • 3 cups chopped leeks, white and green parts (2)
  • 1 cup chopped fennel (1 bulb)
  • 1 1/2 cups arborio rice
  • 2/3 cup dry white wine (I like pinot Grigio)
  • 5 cups warmed chicken stock or broth
  • 1 lb thin asparagus stalks
  • 10 oz frozen peas (not defrosted)
  • 1 Tbsp grated lemon zest (2 lemons)
  • kosher salt and black pepper
  • 2 Tbsp freshly squeezed lemon juice (from the 2 lemons above)
  • 1/3 cup mascarpone cheese (you can sub sour cream)
  • 1/2 cup freshly grated parmesan cheese
  • 3 Tbsp chopped chives, scallions, or microgreens (for garnish)

Instructions

  • To start, prep all your ingredients - risotto is easy to make, but it requires attention frequently enough so that you want everything ready. This includes heating the chicken stock so it's hot when you add it to the risotto - I use a small saucepan on the side, over low heat.
  • Heat the butter and olive oil in a large saucepan or a dutch oven over medium to medium-high heat. Add the leeks and fennel, sautéing for 5-7 minutes until tender. Add the rice, and stir for a minute to coat with the residual fat in the pan, and slightly toast the rice granules.
  • Add the white wine, simmering now over low heat, until fully absorbed, stirring the whole time with a wooden spoon, about 2 minutes. Now start adding ladles of the warm chicken stock, about 3/4 cup at a time, stirring frequently to continue to develop the starches from the arborio. It's not a constant thing - just every minute or so. This process should repeat for a total of about 25 minutes, until the risotto is fully cooked, continuing to add broth as it is absorbed. You will use the entire amount if done properly.
  • Meanwhile, prep for cooking the asparagus and defrosting the peas - this is a simple combined process. First, wash and remove the woody ends of the bottom 1/3 of the asaparagus stalks, and chop the remaining parts into 1 1/2 inch pieces. Bring a small pot of water to a boil, and while you wait, dump the frozen peas into a large bowl filled with some very cold tap water, so you can add the asparagus like an ice bath after blanching. Once the pot of water has come to a boil, salt it (1 TBSP), and add the asparagus pieces to blanche. Cook for about 3-4 minutes, until al dente. Drain, and add to the frozen pea water bowl - this acts like a bowl of ice water, but you don't have to remove the little pieces of ice at the end - the hot asparagus will defrost the peas, and everything is happy at the same time! Drain and set aside.
  • After cooking the rice for about 20 minutes, add the asparagus and pea mixture, along with the lemon zest, 1 1/2 tsp kosher salt, and 1 1/2 tsp crushed black pepper, stirring to combine. Continue adding the rest of the stock to complete the risotto cooking process.
  • Once the risotto is fully cooked (to al dente), remove the pot from the heat. In a small bowl, whisk the lemon juice with the mascarpone, and stir into the risotto with the grated parmesan. Taste for seasoning, and garnish with extra grated parmesan and the chopped chives or scallions.

Notes

This recipe is a Barefoot Contessa killer, from her ubiquitous Back to Basics book, one of my faves.  I have made it countless times, and my only real tweak is a blanching method time saving step of using the frozen peas to shock the asparagus, and simultaneously defrost those little peas - I never liked fishing out the slivers of remaining ice from a cold water bath after blanching.  Now it's one step instead of two!
Continue Reading

Brown Butter Yogurt Banana Bread with Pecans and Dark Chocolate

Banana Bread is something everyone loves and has about a dozen recipes for.  I have always made an old recipe using greek yogurt, which closely mirrored this version, which includes the incredible addition of browned butter that this it over the top.  IMO, it’s the ultimate!  Slightly tweaked from the indomitable Molly Bay’s version from her cookbook “Cook This Book”, which is a never ending source of inspiration.  

This is a flexible recipe.  I’ve used several kinds of yogurt (vanilla, plain, greek, non-fat, whole milk) and even sour cream in a pinch – it all works. It also transitions seamlessly from bread to muffins – I sometimes use mini loaf pans as well.  I think it would travel well for care packages too!

Brown Butter Yogurt Banana Bread with Dark Chocolate and Pecans

Print Recipe
A deliciously moist banana bread laced with dark chocolate and pecans
Course Breakfast, Dessert, Snack
Cuisine American
Keyword banana bread
Prep Time 10 minutes
Cook Time 1 hour
Total Time 1 hour 10 minutes
Servings 10 people

Ingredients

  • 4 over-ripe bananas
  • 10 Tbsp butter (1 1/4 sticks)
  • 2 cups plus 2 Tbsp flour
  • 1 1/2 tsp baking soda
  • 1 1/2 tsp kosher salt
  • 1/2 cup plain or vanilla yogurt (I use whole milk plain)
  • 2 large eggs
  • 1 cup brown sugar
  • 1 tsp vanilla
  • 1 cup chopped dark chocolate chocolate chips work great too
  • 1 cup chopped pecans (optional)

Instructions

  • Preheat oven to 350 degrees. Lightly grease a (9 x 5) loaf pan with softened butter, and line with a piece of parchment paper for easy removal after baking. (You can also make this into 16 muffins)
  • Brown the Butter: Melt the butter in a small saucepan over medium heat, swirling and stirring frequently as it slowly turns golden in color as the milk solids brown - about 6 minutes. Set aside to cool.
  • Mix the Dry ingredients: In a large bowl, whisk together 2 cups plus 2 Tbsp flour, the baking soda and kosher salt.
  • In another bowl, mash the bananas with a potato masher or a fork, until they are smooth in consistency. Add to that, the brown sugar, vanilla, eggs, yogurt and cooled brown butter. Whisk until everything is combined. Then fold in the dry ingredients, being careful to not overmix. When combined, fold in 1 cup of chopped dark chocolate, and 1 cup chopped pecans (both optional).
  • Pour the deliciously golden batter into the prepared pan, and bake in the center rack for about 1 hour and 10 minutes. Alternatively, this recipe works great for muffins (makes about 16 muffins) which should take 18-20 minutes to bake.

Notes

This recipe is slightly adapted from the indomitable Molly Baz, whose recipe can be found in her cookbook called "Cook This Book"!  Thanks Molly! 
I have made this recipe with both plain and vanilla yogurt, as well as sour cream - all of them work interchangeably and yield delicious results!
Continue Reading

Red Velvet Crinkle Cookies

Red Velvet cookies with a crunchy sugar crust and a chewy center.  A recipe from Broma Bakery https://bromabakery.com/red-velvet-crinkle-cookies/ is the perfect treat for winter and your valentines!

January is a long month.  A really long one.  Especially in New England.  I think it’s important to treat yourself a little more this time of year – and these cookies are super fast and easy to make.  These would also make a great care package for Valentine’s Day!

When it’s snowy outside, or rainy or just gray and dreary, a red velvet cookie can truly brighten things up.  We got our first snow yesterday, so here you go!  A red velvet version of a chocolate mint crinkle cookie my mom makes at Christmas time every year.  It uses a LOT of red food coloring, so be prepared.  If you want to make them without, they are just as delicious, but I highly recommend using if you have it.

Red Velvet Crinkle Cookies

Print Recipe
Red Velvet Cookies with a sugar crust and a chewy center
Course Cookies, Dessert, sweets
Cuisine American
Keyword cookies, holiday, red velvet, valentine
Prep Time 10 minutes
Cook Time 10 minutes
Total Time 20 minutes
Servings 16

Ingredients

  • 1/2 cup butter, softened to room temp
  • 3/4 cup brown sugar
  • 1/2 cup granulated sugar
  • 2 large eggs, room temp
  • 2 tsp vanilla
  • 1/2 tsp red gel food coloring ** you will need more if not professional grade - judge by color of dough
  • 2 cups flour
  • 1/3 cup cocoa powder
  • 1/2 tsp kosher salt
  • 1 1/2 tsp baking powder
  • 1/2 cup granulated sugar for coating
  • 1/2 cup powdered sugar for coating

Instructions

  • Preheat oven to 350 degrees, and line a baking sheet with parchment paper.
  • In a stand mixer, combine the butter, brown and granulated sugars, whipping until fluffy. Add the eggs, one at a time, and then the vanilla. Add the red food coloring, and keep going until you have a deeply red base. (see note)
  • In a separate bowl, combine the dry ingredients, flour, cocoa powder, baking powder and salt. Fold the dry ingredients into the wet mixing until thoroughly combined.
  • Fill one bowl with the granulated sugar and another with the powdered sugar. Using a cookie scoop or two spoons, form about 16 cookies into balls, rolling first in the granulated sugar, then in powdered sugar - coat them completely. Place evenly on the baking sheet - they won't spread a ton. Give them one inch between one another. Bake for 10-12 minutes, until soft but set. Cool on a wire rack, and enjoy for days in a tightly sealed container.

Notes

If you are using store-bought food coloring, be prepared to use a lot of it - the cookies will taste delicious without it, but they won't be red without a significant amount, as the cocoa powder tames it.  I order gel food coloring on amazon or buy in a craft store, which is stronger if you want to make these often.  
These cookies come from Sarah Crawford's Broma Bakery blog: https://bromabakery.com/red-velvet-crinkle-cookies/
Continue Reading