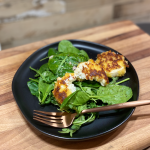
Spicy Ramen Noodles with Ground Chicken and Sneaky Veg

Healthy Ramen Noodles with a Spicy Soy Ginger Sauce, Ground Chicken, Shitakes, and Kale, topped with hot sesame oil.   The mushrooms blend into the ground chicken with the sauce and can be completely undetectable if you have picky eaters – hence, the title…

If I’m being honest, this isn’t my style of food.  My family loves it, and I found this recipe makes me love it too.  It’s an adaptation from Half Baked Harvest’s 30 minute Spicy Sesame Noodles with Ginger Chicken, which is amazing and easy, and I’ve tweaked it slightly here.  It’s an easy meal to make ahead and leave in the pot, allowing everyone to heat portions as needed.  It’s also great the next day for lunch, or dinner again!  Great for the busy seasons, and healthy enough for a Monday night of feeling good about what you are eating.  

The ingredients are supremely healthy here, and as always, it’s worth the splurge to buy the good stuff.  I find the ramen noodles in packs of 4 at Whole Foods, pictured above (2 oz each) which means my family needs 1.25 boxes for this meal, but you likely would be fine with just one.  You can also use Ramen packets and simply discard the packaged seasoning.  I also should state this recipe is SPICY – in a REALLY delicious way, but if you don’t love spice, perhaps omit the red pepper flakes in both locations of this recipe, and substitute a small amount of black pepper with just the chicken mixture.  

Spicy Ramen Noodles with Ground Chicken and Sneaky Veg

Print Recipe
Ramen Noodles, with Ground Chicken, Kale, Mushrooms and a Spicy Ginger Soy Sauce.
Course dinner
Keyword ramen, noodles, healthy, ground chicken, kale, mushrooms
Cook Time 25 minutes
Servings 6

Ingredients

  • 1/2 cup soy sauce
  • 1/4 cup pomegranate juice
  • 2 Tbsp honey
  • 3 Tbsp Sesame Oil
  • 1 lb ground chicken
  • 1 Tbsp red pepper flakes
  • 4 cloves garlic, minced
  • 1 inch knob of fresh ginger, grated on a microplane
  • 3 cups finely chopped shiitakes and/or crimini mushrooms
  • 2-3 cups shredded tuscan kale ribs removed
  • 10 oz ramen noodles
  • 2 Tbsp sesame seeds
  • 1/4 cup scallions, sliced diagonally
  • pomegranate arils, for topping

Hot Sesame Oil for Topping

  • 1/4 cup sesame oil
  • 1 tsp red pepper flakes
  • 1/4 cup chopped peanuts

Instructions

  • In a glass measuring cup, mix the soy sauce, pomegranate juice, honey, and 1/2 cup water. Set aside for use later
  • In a large skillet with high sides, or a dutch oven, heat the sesame oil over medium heat, and cook the ground chicken until no longer pink. Add the red pepper flakes, garlic, ginger, and mushrooms, stirring to combine and release the flavors. Add 1/2 of the soy sauce mixture, and cook for 2-3 minutes, until the liquid has concentrated a bit. Add the kale and the remaining soy sauce mixture, and simmer over medium low heat for a few minutes until the kale has wilted, and everything comes together.
  • Meanwhile, in a large saucepan, cook the Ramen noodles according to package directions - drain and reserve to add to the chicken mixture in the large pot.
  • When the kale has wilted, add the noodles, along with the sesame seeds and sliced scallions, remove from the heat and stir to combine. When ready to serve, top with the Hot Sesame Oil below, or simply top with crushed peanuts, sliced scallions and pomegranate arils.

Hot Sesame OIl for topping

  • In a small saucepan, cook the sesame oil with the red pepper flakes until hot, then pour into a glass bowl with the chopped peanuts.

Notes

This recipe is an adaptation from Half Baked Harvest's 30 minute Spicy Sesame Noodles with Ginger Chicken - it's a great dish and I have only tweaked a few things.
If you have picky eaters, don't let them see the mushrooms - they will never know they are in there if you chop them up small enough!
This dish is spicy - tread lightly with the red pepper flakes if you aren't hoping for that!  
Continue Reading

Roasted Italian Meatballs with Creamy Parmesan Polenta

Roasted Italian Meatballs, simmered in marinara sauce, served with creamy parmesan polenta.  Two Barefoot Contessa recipes worth putting on repeat.  These are being dubbed “Bobby’s Meatballs” in a nod to Bobby Carlin, whose Thanksgiving was never complete without meatballs – we think he’d approve!

These recipes are both incredible on their own, and probably should be separate posts, but they are SO GOOD TOGETHER!  The meatballs are to die for, easy to make, and freeze well.  The polenta is perfection, and works well with roasted veggies or just straight out of the pot with a spoon.  Thanks Ina for being the food genius that never fails.  

I forgot to include the chopped garlic in the photo of ingredients for the polenta (right side).  The polenta is simple, and so are the meatballs, so once again, quality is key.  If you don’t like to use veal, just double the ground pork – the meatballs will be amazing.  

I purchase Quart size containers on Amazon (the ones you see in prepared food stores) as they freeze well and stack in the fridge easily.  You can make this ahead and serve later in the week – up to 3 days without freezing – the polenta should be made the same day though.  

Roasted Italian Meatballs with Creamy Parmesan Polenta

Print Recipe
Roasted Italian Meatballs simmered in marinara with creamy parmesan polenta - AKA "Bobby's Meatballs"
Course dinner
Cuisine Italian
Keyword meatballs, polenta
Prep Time 15 minutes
Cook Time 30 minutes
Servings 8

Ingredients

Roasted Italian Meatballs

  • 1 lb ground beef 85 percent is great here
  • 1/2 lb ground pork
  • 1/2 lb ground veal use double ground pork if you don't eat veal
  • 1 3/4 cups dry seasoned breadcrumbs
  • 1/2 cup freshly ground parmesan 2 oz
  • 1/2 cup freshly ground pecorino 2 oz
  • 2-3 cloves garlic, minced
  • 2 Tbsp chopped fresh parsley
  • 1 tsp kosher salt
  • 1 tsp black pepper
  • 1 tsp red pepper flakes optional
  • 2 large eggs, beaten
  • 3/4 cup red wine I use cabernet
  • 3/4 cup water
  • 1/2 cup olive oil this is for brushing the meatballs before baking
  • 2 jars Rao's Marinara (32 oz each)

Creamy Parmesan Polenta

  • 6 cups chicken stock
  • 2 cloves garlic, minced
  • 1 1/2 cups stone ground whole grain cornmeal Bob's Red Mill Medium Grind is great here
  • 2 tsp kosher salt
  • 1 tsp black pepper
  • 1 1/2 cups grated parmesan
  • 4-6 tbsp creme fraiche
  • 3 Tbsp unsalted butter, diced

Instructions

Roasted Italian Meatballs

  • Preheat the oven to 400 degrees, and arrange two racks in the center of the oven. Line two baking sheets with parchment paper.
  • In a large bowl, mix the ground beef, veal, and pork together with a fork and your fingers, breaking it up as you go. Add the bread crumbs, pecorino, parmesan, garlic, parsley, salt, pepper, red pepper flakes, eggs, wine and water, mixing thoroughly but gently - you don't want to compress the mixture.
  • Using a 2 oz (1 3/4") ice cream scoop, form the meatballs and spread evenly between the two baking sheets - you will have about 30 in total. Brush the tops with olive oil, and roast for about 20-25 minutes, until lightly browned.
  • In a large pot, heat the marinara sauce over a medium-low flame, and gently add the meatballs to the sauce, and simmer for about 10 minutes. Keep warm and serve with the polenta and a sprinkle of shaved parmesan.

Creamy Parmesan Polenta

  • Add the minced garlic to the chicken stock in a large stock pot and bring to a boil. Reduce heat to a simmer, and slowly pour the cornmeal into the stock, stirring constantly with a whisk to break up any clumps that might form. Add the salt and pepper, and continue to simmer for another 8-10 minutes, stirring frequently with a wooden spoon. Depending on your desired consistency, remove from the heat when it hits the thickness you want. Off the heat, add the parmesan, creme fraiche, and diced butter. This will thicken the polenta as well. Taste for seasoning and serve hot with meatballs and sauce.
  • I let this sit in a covered pot off the heat, and reheat as needed, thinning with extra chicken stock. Many recipes say you can't make polenta ahead, but I find it reheats well like this.

Notes

These are two of my all time favorite Barefoot Contessa recipes, found in her book titled, "Cooking for Jeffrey".  The meatballs are even better the next day, freeze well, and please a crowd for a weeknight dinner,  holiday meal, or a game day sandwich spread.  My husband and son prefer the meatballs in a sub, but all the girls in our house like the polenta - almost more than the meatballs themselves!  My son also loves to bring leftovers for lunch at school in a thermos. 
Continue Reading

Slow Cooker French Chicken with Mustard and Kale

Slow cooked chicken simmered in white wine, mustard, and cream, with kale, shallots, and parmesan.  I truly love this with mashed potatoes, but baked rice or polenta are a great base too.  

A favorite slow cooker recipe that feeds a crowd and works for those busy weeknights most are experiencing this time of year.  This is a Half Baked Harvest gem – Tieghan Girard calls this “Slow Cooker French Wine and Mustard Chicken”. https://www.halfbakedharvest.com/slow-cooker-french-wine-and-mustard-chicken/, which fits but I changed the name a touch to reflect the flavors I find make the dish.  I absolutely love this, and you will too.  

Simple ingredients here, so quality is key.  Searing the chicken is important, imparting flavor and texture to the chicken, more than most slow cooked recipes I’ve tried.  The Sauce is simply thrown in and stirred, toss the chicken in with a few pats of butter and close the lid.  

Slow Cooker French Chicken with Mustard and Kale

Print Recipe
Slow cooked chicken simmered in white wine, mustard, and cream with kale, shallots and parmesan.
Course dinner
Cuisine American, French
Prep Time 20 minutes
Cook Time 3 hours
Total Time 3 hours 30 minutes
Servings 6
Cost $25

Equipment

  • slow cooker

Ingredients

  • 4-6 split chicken breasts, skin on, deboned roughly 2.5 lbs
  • kosher salt and black pepper
  • 2 Tbsp chopped fresh thyme leaves, divided in half
  • 1 1/2 cups dry white wine I like Pinot Grigio
  • 1/2 cup heavy cream, or full fat canned coconut milk
  • 3 Tbsp dijon mustard
  • 3 Tbsp whole grain mustard
  • 3 shallots, thinly sliced
  • 3-4 cloves garlic, smashed, peeled, and minced
  • 2 Tbsp Olive oil
  • 3 Tbsp butter
  • 1/2 cup grated parmesan
  • 1 bunch tuscan kale, stemmed and roughly chopped

Instructions

  • Start by seasoning the chicken liberally with salt and black pepper, and 1 Tbsp of the chopped fresh thyme. Let the chicken rest and come close to room temp while you preheat a 12 inch skillet (cast iron works great here) to medium high heat.
  • In the basin of your slow cooker, combine the ingredients for the sauce - white wine, cream or coconut milk, both mustards, shallots, garlic, and the remaining Tbsp of thyme. Stir until you see everything come together.
  • When the skillet is hot, add 2 Tbsp of Olive oil, and sear the chicken, skin side down first, for roughly 3 minutes a side, looking for a golden crust. Be careful not to overcrowd the pan, as the skin will steam rather than get the desired color. I tend to do this in two batches, and keep the chicken on a plate to the side in between. When done, place all the chicken into the sauce in the slow cooker, keeping the skin up and out of the liquid. Add any remaining juices from the plate too - even if just a tablespoon of drippings, they hold incredible flavor. Throw the butter into the top in a few pieces, cover and cook on high for 2 1/2-3 hours. Cook time will depend on the size of your chicken breasts.
  • At the end of the cook time, remove the chicken to a plate, and toss the kale and parmesan into the cooking liquid. Cook on high for another 5-10 minutes until the kale is wilted. Then put the chicken back into the sauce, and serve as you like. I like this dish over baked white rice, mashed potatoes, even polenta. It also holds up on it's own with a side of salad.

Notes

This recipe is taken from Half Baked Harvest, Tieghan Girard's incredible food blog - she calls it "Slow Cooker French Wine and Mustard Chicken" - I have only made minimal tweaks, but renamed it as I think it claims the true flavors of the recipe more.  
You can make this with skinless chicken breasts, but I highly recommend using skin on - it's easy to de-bone chicken breasts if your butcher doesn't offer it cut this way.  
Continue Reading

Turkey Burger Sliders

Oprah’s favorite turkey burgers, downsized and done right!   Hands down the winner for all turkey burgers I’ve come across.  These are kid friendly, adult approved, and full of healthy ingredients that come together brilliantly!

This recipe is a spin on the iconic Maralago Turkey Burger, which Oprah made headlines with in 2008, declaring it her favorite turkey burger.  It’s deserving of the spotlight, and the reason I know about them is my awesome sister Alyssa!  She made these for us when our third child was born (13 years ago) as a prepped meal for easy dinners with a new baby, and we have been making them ever since!

Turkey burgers get a bad rap, and they often should.  Unusually dry and bland, they can taste like cardboard.  These are the complete opposite – flavorful and juicy, with warm spice and hints from fresh flavors that balance them perfectly.  They are easy to prep in advance and cook later, as they benefit from resting in the fridge.  They also freeze well, which makes them a great make ahead meal for busy weeknights.  They are also a great dinner option to lend a hand to someone in need, whether it’s a new baby, job, or whatever else life is throwing at us lately.  (I forgot to put the lemon in this pic!)


Trader Joe’s sells the most adorable tiny seeded slider buns for burgers, and they work great with these turkey sliders.  It’s a fun meal that makes a great leftover after school snack too, when downsized like this.   The ingredients to the right are for serving and topping – including the TJ’s slider buns.

Turkey Burger Sliders

Print Recipe
Oprah's favorite turkey burger, downsized and done right!
Course dinner, Lunch
Cuisine American
Keyword turkey burger, maralago turkey burger, sliders
Servings 6

Ingredients

  • 1/8 cup chopped scallions
  • 1/8 cup chopped celery
  • 1 Granny Smith apple, peeled and chopped
  • 1/8 cup canola oil
  • 1 tsp kosher salt
  • 1/2 tsp black pepper
  • 2 lbs dark ground turkey meat
  • 1 tsp tabasco
  • 1/2 lemon, zest grated and juiced
  • 1/2 cup chopped fresh parsley
  • 1/8 cup mango chutney SEE NOTES**
  • burger buns I use slider buns from Trader Joe's
  • 12 slices cheddar or Monterey Jack cheese
  • 1/2 cup mayonnaise
  • 2 Tbsp mango chutney
  • 2 dashes tabasco
  • sliced avocado, for serving if desired

Instructions

  • To start, you need to soften and cook the vegetables that will make these burgers so tasty! Preheat a 12 inch skillet over medium heat, add the canola oil, scallions, celery, and apples, seasoning with the salt and pepper to release the juices. Cook over medium heat, avoiding browning, just until everything is soft and pliable. Remove, and cool on a separate plate.
  • When the vegetables are cooled, add them to the turkey meat in a large bowl, along with the tabasco, lemon zest and juice, parsley, and mango chutney (if you are using Major Grey's brand, be sure to puree it in a blender before incorporating). Form the mixture into 6 large or 12 smaller slider size burgers. and refrigerator for at least one hour, preferably several hours.
  • I prefer cooking these in a heavy cast iron skillet vs. a grill, but you can do either. For the skillet, preheat over medium high heat, and for sliders, you will want to cook about 5 minutes per side, tenting with foil to cook through, or using a lid on the pan that vents to prevent steaming (leave a one inch gap at least). For full size burgers, this will take about 7-8 minutes per side. Flip, and cover with cheese at the end to melt during the last minutes of cooking. If you are using a grill, the same cooking times will likely apply over a medium level of heat.
  • For serving, I like to combine 1/2 cup of mayonnaise with 2 Tbsp of mango chutney and 2 dashes of tabasco - this is a great spread to go on the buns - like a spicy aioli. I top with micro greens and that's it - avocado is delicious on these as well.

Notes

  •  This recipe originates from the Maralago resort, and was featured by Oprah as her favorite turkey burger.  I have made a couple of minor adjustments.
  • The original recipe calls for Major Grey's Chutney, which I find to be too chunky, and it needs to be pureed before incorporating.  I prefer Sukkhi brand (Whole Foods carries it) - simply called Mango Chutney - it's already smooth.
  • Thanks to my awesome sister, Alyssa, for introducing our family to this amazing recipe!
Continue Reading

Roast Chicken with Goat Cheese

Simple chicken perfection with goat cheese, sun-dried tomatoes, and basil, roasted under crispy skin.  This is a dinner that is often requested by all four of my kids, which is a rarity!

This is a classic Barefoot Contessa recipe that I’ve been making for as long as I have cooked.  It’s an easy dinner that you can assemble ahead, and roast when you are ready to eat.  You can switch up the cheese – I have used Boursin, which gets messy (but delicious!), feta, or even mozzarella.  Leave the tomatoes out and sub in some sautéed mushrooms, spinach, or just do the cheese and basil – it’s a great base recipe with lots of variations to work with.  

This is another recipe with such few ingredients that the quality really matters – buy the best chicken breasts you can find.   

Roast Chicken with Goat Cheese

Print Recipe
Boneless Chicken with Goat Cheese, Sun-dried Tomatoes, and Basil, Roasted under crispy skin.
Course dinner
Cuisine American
Keyword chicken breast, goat cheese, roasted chicken, basil, tomatoes
Servings 6

Ingredients

  • 6 boneless chicken breast halves, skin on
  • 12 oz herbed or plain goat cheese. sliced into discs
  • 12 pieces of sun-dried tomatoes, in olive oil, drained
  • 1 small bunch of large basil leaves
  • 2 Tbsp olive oil
  • 2 tsp kosher salt
  • 1 tsp ground black pepper

Instructions

  • Preheat the oven to 375 degrees, with a rack positioned in the middle of the oven.
  • Gently pull the chicken skin up on one side of each breast, and slide in two pieces of sun-dried tomatoes, two discs of goat cheese, and two leaves of basil, stacking and then folding the skin back over the top. You are almost making little chicken presents, stuffed with all these items, and then wrapped in the skin again. Line the chicken gifts up spaced on a baking sheet.
  • Drizzle olive oil generously over the top of each chicken breast when stuffed, then sprinkle heavily with salt and pepper - there is a lot to season here, so go for it! Toss the baking sheet in the oven, and roast for 35 minutes, until the chicken registers 165 degrees.
  • To serve, simply cut into the chicken and enjoy - this goes great with a simple green salad or any roasted vegetable.

Notes

This is one of the best healthy dinners from the iconic Barefoot Contessa - a recipe I've been loving for years, and has become a heavily requested repeat by all four of my kids - which is a rare thing!
This can be assembled in advance, but I don't recommend roasting until you are ready to eat.
Continue Reading

Slow Cooker Chicken Parm

Easy, reliable, and incredibly delicious chicken parmesan, topped with Rao’s and mozzarella – the ultimate weeknight indulgence.

September always sneaks up on us, and before we know it, the lazy summer schedule is long gone and life gets back in action – full throttle.   Open house nights, kids sports, meetings, and just getting busy with schoolwork all add up to less time to make dinner in those important evening hours.  The slow cooker is my best friend in times like this.  I have a few great recipes, and this one might just be my favorite.  It stands up on its own, can be turned into a pasta sauce, and makes everyone happy ages 2 to 92.  It’s a combination of many simple recipes found on-line, and I think it rocks.  

The chicken gets breaded, and bakes in the bottom of the dish, topped with marinara (RAO’S!) and shredded mozzarella, and the entire thing cooks into a tender, delicious mess of a meal.  It won’t look like your typical chicken parmesan with one piece of chicken per serving, but rather piles of torn chicken bathed in red sauce and gooey cheese, lending itself almost better to a shallow bowl than a plate.   Sometimes I like to toss in cooked pasta after finishing the cooking, shredding the chicken into a thick pasta sauce, and topping with a little more shredded cheese and slow cooking until that melts – like a chicken parm lasagna on steroids!

Slow Cooker Chicken Parm

Print Recipe
Incredibly tender and delicious way to cook everyone's favorite chicken dinner - slow cooked with Rao's and mozzarella, topped with fresh basil and red pepper flakes.
Course dinner
Cuisine Italian
Prep Time 15 minutes
Cook Time 4 hours
Servings 6 people

Equipment

  • slow cooker

Ingredients

  • 2 Tbsp Olive Oil
  • 2 1/2 - 3 lbs boneless, skinless chicken breasts
  • kosher salt and black pepper
  • 1 large egg
  • 1 cup Italian Style breadcrumbs
  • 3/4 cup grated parmesan cheese
  • 1 28 oz jar of Rao's Marinara Sauce
  • 12 oz grated mozzarella cheese
  • 1 sprig fresh oregano, or 1 tsp dried
  • 1 tsp red pepper flakes

Instructions

  • First, oil the basin of the slow cooker with about 2 Tbsp of Olive Oil. This will both help form a crust, and prevent the chicken from sticking to the sides of the dish.
  • Rinse and pat dry your chicken breasts - you should have about 5 -6 in total. Season liberally with salt and pepper. In a shallow bowl or pie plate, combine the egg with 1 Tbsp of water, whisking to combine with a fork. In a second shallow bowl, mix the breadcrumbs and grated parmesan cheese. Working with one chicken breast at a time, dip in the egg wash on both sides, and then into the crumb mixture, pressing to adhere on all surfaces. Place the chicken breasts like a puzzle into the bowl of the slow cooker. It's fine if they overlap, but they should cover the base fully.
  • When the chicken is all in the basin, top with a jar of Rao's Marinara, or sauce of your choice. No need to mix, as this dish cooks in layers and the sauce helps seal the chicken for tender cooking below. On top of the marinara, add a thick layer of mozzarella, top with oregano and red pepper flakes, and put the lid on! Cook on HIGH for 3-4 hours - I tend to find it done around 3 hours or so, but depending on your slow cooker, you may need four hours.
  • When ready to serve, dig into the chicken and pull out by the spoonful from the top - the chicken will be fall apart tender, so on the plate this won't look like a traditional chicken parmesan breast, but trust me it's DELICIOUS! Serve with extra grated parmesan and freshly torn basil.

Notes

This is my version of a very common internet recipe, that uses parts from several out there - I love this so much I eat the leftovers for breakfast the next day.
This also makes an incredible pasta sauce when shredded - you could even add cooked pasta for the last thirty minutes of cooking and top with an extra layer of cheese.  
Continue Reading

Make-Ahead Tailgate Dogs

Hot dogs for a day at the game, the beach, boat, or any other time you want a quick and easy meal on the go.  Summer is winding down, so let’s make the most of it and keep things simple.  Leave more time for the fun stuff!

This is hardly a recipe, but rather a simple suggestion on how to make a fun picnic lunch for whatever your adventures are this weekend.  Nothing tastes better than a hot dog on the beach, but it’s not always easy to bring a grill along for the trip.  While this won’t be exactly as hot as a fresh off the griddle dog, it’s close and makes a simple lunch that feeds a crowd of all ages.  This could also work in a ski lodge for a mid-day lunch – options abound for how to use this recipe – get out there and enjoy the weekend!

While I won’t take any credit for the recipe (it’s just hot dogs and buns), the method of transport is the key here.  If you pan grill or fry the hot dogs ahead, wrap them in foil, and then stick them all into a cooler, it becomes a traveling warming oven, and works exactly as you would hope – to keep your hot dogs hot!

Make Ahead Tailgate Dogs

Print Recipe
Hot Dogs for the road, grilled and wrapped for the perfect lunch on the go!
Course Lunch
Cuisine American
Keyword hot dogs, make ahead, picnic food
Servings 10

Equipment

  • a small to medium sized cooler, for keeping the hot dogs warm

Ingredients

  • 16 hot dogs
  • 4 Tbsp butter
  • 16 hot dog buns
  • mustard and onions for serving

Instructions

  • Preheat a cast iron skillet, grill pan or fry pan over medium heat, melt 2 Tbsp of the butter, and cook the hot dogs until golden brown and slightly blistered, about 7-8 minutes total, turning every few minutes for even cooking.
  • Remove the hot dogs from the pan, and grill the buns in the remaining butter in the pan, about 30 seconds a side. Assemble the hot dogs individually, and wrap each fully in it's own tinfoil package. Stack the wrapped hot dogs into a cooler (withOUT ICE!), which will become a warmer for the hot dogs - they should stay warm for several hours, depending on the quality of your cooler.
  • Enjoy with the toppings of your choice!

Life is short, so let’s eat hot dogs.

Continue Reading

Skillet Pizza with Corn, Bacon and Chives

Easy cast iron skillet pizza with summer produce, bacon bits, and mozzarella.  This will become your favorite way to make pizza at home.

This one skillet wonder comes together in minutes for an incredibly delicious end of summer pizza that is perfect for lunch, dinner, or a snack on the beach or boat.  A quick white pizza gets a dose of flavor from bacon fat in the skillet, making every bite unbelievably good!

This recipe came to me after I purchased ingredients to make homemade corn chowder (that will come soon), and nobody wanted that.  So, I switched directions and used much of the same ingredients for this awesome almost-deep-dish pizza.  The cast iron skillet is one of my favorite ways to make pizza, as it gives the crust the perfect golden crunch.  The only drawback is I have to usually make two to feed my family – other than that, it’s one of the easiest dinners around – this one feeds 4, or 6 as a side or appetizer.  The best part is you brown the bacon bits and corn in the same skillet for baking the pizza, so the clean-up is minimal and the flavors are solid.  

Skillet Pizza with Corn, Bacon, and Chives

Print Recipe
Easy cast iron skillet pizza with cheddar cheese and fresh summer corn, bacon and chives.
Course dinner, Lunch
Cuisine Italian
Keyword pizza, skillet pizza, corn, bacon, white pizza
Servings 4

Equipment

  • Cast Iron Skillet

Ingredients

  • 1/2 lb pizza dough at room temperature
  • 4 slices thick cut bacon, chopped
  • 1 ear fresh corn on the cob, shucked
  • 8 oz mozzarella cheese, grated NOT fresh mozzarella
  • 2-3 Tbsp grated Pecorino cheese
  • 1 tsp red pepper flakes
  • 2 Tbsp chopped fresh chives
  • 1 tsp torn basil, for garnish

Instructions

  • Preheat the oven to 500 degrees, with a baking rack set in the middle.
  • Heat a 11-12 inch cast iron skillet over medium heat, and add the chopped bacon to the pan to brown. As the bacon nears finishing, add the corn cob to the skillet, to sear it on all sides in the bacon drippings. If you have very fatty bacon, you can remove some of the fat before adding the corn - you don't want this to be oily.
  • Remove the bacon bits to a paper towel lined plate, and finish searing the corn on all sides until slightly cooked through and golden brown in spots. Remove the corn when finished, and set aside to cool. When the corn is cooled enough, holding the cob sideways on a cutting board, remove the cooked kernals for topping the pizza. I use a chef's knife, rolling the corn cob around to remove all the corn.
  • Leave the pan on a very low heat while you stretch out the pizza dough. If there is a lot of reserved fat in the pan, wipe some out, but a little oil or grease is part of the key to making this incredibly crispy crust.
  • Using the heat of your hands, stretch out the pizza dough. You may need to use a little flour to keep it from sticking. Alternatively, you can roll the dough out in a traditional way - I find my hands to do the trick with this one. You want a disk that fits in the bottom of the cast iron skillet - it doesn't have to be perfect, but stretch it out to the sides as best you can.
  • Make sure you have all of your toppings ready to go - this needs to be assembled fairly quickly as it starts to cook in the pan. When you are ready, add the pizza dough into the skillet (still with the bacon grease!), being careful to spread it out without burning yourself. The skillet is still hot!
  • Working quickly, add the shredded mozzarella, the red pepper flakes, and the pecorino, spreading the ingredients all the way to the edge. This cooking method lends to a big bubbled crust, and I like it to have cheese on top! You can let the crust cook for a minute or two over the low heat. Using pot holders, remove the skillet from the burner, and place it in the center of the oven, cooking for about 12 minutes. The pie will be puffed and golden brown when finished.
  • When done baking, remove the skillet cafefully with the pot holders again, topping the pizza with the crumbled bacon and chives. You can serve this pizzza hot right out of the skillet, or almost like a cheesy bread at room temperature. It should be very easy to lift out of the skillet, when you want to.

Notes

This pizza uses a method of cooking that almost fries the bottom of the crust, leading to a tasty finished dough all the way through - it works with all toppings!
 
Continue Reading

Welcome Home Pasta

The Ultimate delicious, easy pasta that cooks in minutes and tastes like home.

Pasta with sausage, sauce and herbs, so simple and quick; so easy it’s almost not a recipe.  And seriously delicious!  Summer, like the rest of the year, seems to be a time when everyone is moving in different directions in our family.  This pasta has been on repeat for occasions when we find ourselves coming together again, and don’t necessarily have the time or energy to cook something elaborate.  It was my father-in-law who came up with the name – I think it’s perfect.  

I first made this for dinner in June when we had been out of town for a few days, and upon returning, stopped by a farm on the way home from picking up our dog.  The market has the most incredible produce, meats, cheese, eggs, etc…  It was the only stop I needed that night to cure our empty fridge situation, and inspire the pasta recipe here.  I threw in a spinach and cucumber salad and dinner was done in about 15 minutes.  I should mention that my 12 year old son has perfected this recipe too – it’s that simple.  

The recipe works with whatever kind of sausage you choose – just remove it from the casings and crumble it as you brown it with the onions.  You could use ground meat as well (chicken, pork, beef), and just add some extra seasoning to amp up the flavor – I would suggest oregano, garlic, and more red pepper flakes.  You could also keep it plant based and just use some chopped zucchini in place of the meat.

Welcome Home Pasta

Print Recipe
Ultimate fast, easy, and DELICIOUS - the perfect homecoming dinner.
Course dinner, Main Course
Cuisine Italian
Servings 6

Ingredients

  • 2 Tbsp Olive oil
  • 3 links of sausage - chicken or pork, spicy or sweet About 1 - 1 1/2 lbs total
  • 1 small white or yellow onion, diced
  • 3 cloves garlic, minced
  • 1 tsp red pepper flakes
  • 1 28 oz jar of Rao's Marinara Sauce
  • 1/4 cup chopped fresh basil, plus more for garnish
  • 1 Tbsp chopped fresh oregano
  • salt and pepper to taste
  • 1 lb. dried pasta
  • 1/2 cup grated parmesan, plus more for garnish

Instructions

  • Boil a pot of water for the pasta.
  • Break the sausage meat out of the casings. Heat a large stock pot or a dutch oven over medium high heat, and add the olive oil. Add the sausage, breaking up as you cook it almost all of the way through. When almost done, add the onion to the pan, continuing to break up the sausage meat. The idea is to give it a similar consistency to ground beef almost, so the sausage is distributed throughout the sauce at the end.
  • When the sausage is fully cooked, and onions translucent, add the garlic, red pepper flakes, salt and pepper, and cook for one minute, being careful not to burn the garlic. Add the jar of sauce, and simmer over low heat while the pasta cooks.
  • Cook the pasta according to package directions, al dente. Drain when finished, reserving a cup of the cooking water in case you want to thin the sauce. Add the cooked pasta directly to the sauce in the large pan, stirring to combine. Thin to your liking with the starchy pasta cooking liquid.
  • Turn off the heat, and add the parmesan, basil, and salt and pepper again if needed. Likely you won't need much extra seasoning, with the sauce and sausage. Serve in large shallow bowls with extra parm and freshly torn basil. I like a little extra red pepper flakes on mine.

Notes

The beauty of this pasta is the simplicity and ease of a home made meal that is filling and delicious in literally minutes.  Make sure you use good quality ingredients here - house made sausage is available at almost every grocery store these days, and makes a huge difference.  
If you use chicken sausage, you may need a little extra oil at the outset, as pork sausage has more fat that renders in cooking.  
I find that the trickier the pasta shape, the more the chunky sauce clings to it - find the fun stuff!
Continue Reading

Grilled Striper with Creme Fraiche and Cucumber Tartar Sauce

Simply grilled fresh striped bass with a homemade cucumber and creme fraiche tartar sauce – a classic from Cru Nantucket!

When your boy catches fish… you open up the Cru Nantucket cookbook and get grilling.  This recipe is simple and fresh, easy and light, and a touch decadent with a creme fraiche tartar sauce, made with tons of herbs and grated cucumber.  These are the ingredients that let the main ingredient shine – as it should.  The first step to this recipe, requires either a good fish market, or better yet, a great friend who knows where the fish are!  We are lucky to call this guy exactly that – JB a legit friend with superb fishing benefits.  Please note – the fish pictured was let go, as it was above the allowed size, but don’t worry, they caught another one that was just perfect!

The best part about fresh fish is you really don’t have to do much to it for dinner to be incredible.  Turning to the experts, I found this recipe in the Cru Nantucket Cookbook.  I made a couple of minor tweaks, and this recipe will work for most white fish you can grill – halibut, swordfish, even lobster if you are up for that.  Classic summer flavors that just make the fish taste more like itself and fresh.  

I think what sold me on this recipe was the counterpart – the cucumber tartar sauce.  It’s not just a condiment, but the second star of the dish – boosted with the richness of creme fraiche (the Cru version recommends mayo, but I like the tanginess of the CF) and literally tons of herbs, grated cucumber, and lemon zest, it’s like a tatziki on steroids.  It pairs well with the fresh fish, but you could imagine this on a bun with fried chicken, grilled veggie’s or even the old stand by of a frozen fish stick – elevate the ordinary!

Grilled Striper with Creme Fraiche and Cucumber Tartar Sauce

Print Recipe
Simply grilled striped bass fillets with a creamy cucumber tartar sauce
Course dinner, Lunch, Main Course
Cuisine American
Keyword grilled striper, striped bass, tartar sauce, grilled fish
Servings 6

Ingredients

  • 2-3 lbs striped bass fillets
  • 1/2 lemon, to squeeze over the fish when done cooking
  • flaked sea salt for finishing

Grilled Fish Marinade

  • 1/2 cup chopped chives
  • 1/2 cup chopped fresh parsley
  • 1 Tbsp lemon zest
  • 2 cloves garlic, smashed and minced
  • 1/2 large shallot, minced
  • 3 Tbsp olive oil
  • 1 tsp red pepper flakes
  • salt and pepper

Creme Fraiche and Cucumber Tartar Sauce

  • 1 hothouse cucumber, sliced in half, seeds removed
  • 8 oz creme fraiche
  • 1/4 cup chopped parsley
  • 1/2 cup chopped chives
  • 1/4 cup drained capers
  • 1/4 cup chopped pepperoncini
  • 1 tsp lemon zest
  • salt and pepper to taste

Instructions

Grilled Fish Marinade

  • Combine all ingredients in a bowl, and stir until well mixed.

Creme Fraiche and Cucumber Tartar Sauce

  • This is best made in advance. Mix all the ingredients together and rest in the fridge until ready to serve. This will keep for a week in a sealed container.

For the Fish and Preparation

  • Step one - find yourself a great friend who is amazing at fishing.
  • Clean your striper filets, deboning if needed - a pair of tweezers works well with this. You can run your hand down the back of the fish to feel for the flexible bones. If they don't pull out easily, do it after cooking - they will slide out easily then.
  • Coat the fish with the marinade while you preheat your grill to medium high heat. The fish can sit in the marinade for up to several hours in the fridge, but even a 20 minute rest helps with the flavor.
  • When the grill is hot, coat the grates liberally with a neutral oil (I use canola on a paper towel, and run it over the grill with tongs). The fish can stick to the grill, so this is an important step, as this marinade isn't very heavy on the oil.
  • Grill the fish, skin side down if you have skin on filets, then flip after 5 minutes or so, finishing with another 5 minutes on the other side. This is a fish you want to cook all the way through - depending on the thickness and the heat of your grill, you may need to adjust the cooking time. You want the fillets to bounce back when touched, and they should flake easily.
  • Remove from the grill when cooked, and finish with a squeeze of fresh lemon juice (I used half a lemon for ours). Sprinkle with a little flaky sea salt and serve with the cold tartar sauce.

Notes

This recipe is from Cru in Nantucket, a relatively newer restaurant in the Nantucket scene that has literally become legendary - especially for recipes like this.  Their cookbook features many fresh fish recipes, and this is a classic.  The cookbook is called Cru Oyster Bar Nantucket Cookbook - pretty easy!
Continue Reading